Introduction
CNC prototype machining is a critical process for creating highly accurate prototypes with speed and efficiency. If you’re looking to bring your product designs to life, CNC machining offers precise, repeatable, and cost-effective solutions. Whether you’re designing a new product or need to test concepts, understanding the CNC prototyping process can help you streamline your development cycle. In this comprehensive guide, we’ll take you through each step of CNC prototype machining, from design to finished prototype, helping you grasp its benefits and how to implement it successfully.
What is CNC Prototype Machining?
What is CNC Prototype Machining?
CNC prototype machining refers to the use of computer numerical control (CNC) machines to create prototype parts. These machines are capable of performing highly precise machining operations, such as cutting, milling, turning, and drilling, based on a computer-aided design (CAD) file. In the context of prototyping, CNC machining is used to transform digital designs into tangible, functional parts. The accuracy of these machines ensures that prototypes closely resemble the final product, making it easier to test form, fit, and function before moving into mass production.
Why CNC Machining is Ideal for Prototypes
CNC machining is particularly beneficial for creating prototypes due to its speed, cost-effectiveness, and precision. Unlike traditional methods, CNC machines can produce parts quickly with minimal human intervention. The automated process ensures high consistency and accuracy, which is vital for functional prototypes that need to be tested under real-world conditions. Additionally, CNC machines can handle a wide range of materials, allowing engineers to experiment with various options to determine which material works best for their design.
CNC prototype machining also offers the advantage of fast iteration. Designers can easily modify CAD files to refine their prototypes, enabling rapid prototyping and quick feedback loops. This is crucial in industries where time to market is essential, and early-stage prototyping can significantly shorten product development cycles.
Types of CNC Machines Used in Prototyping
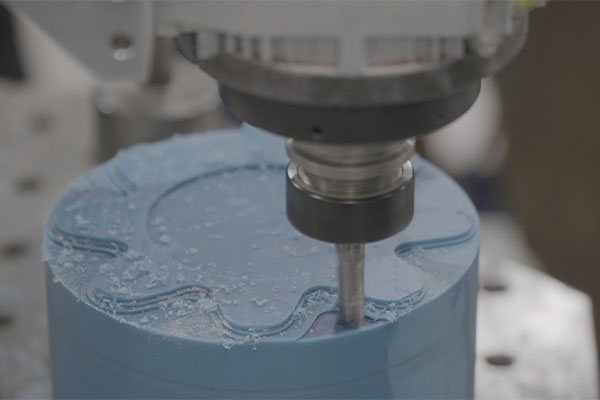
CNC Milling Machines
CNC milling machines are commonly used in prototyping to cut, drill, and shape materials. These machines have rotating cutting tools that move along multiple axes, enabling them to create complex shapes and detailed parts. Milling machines are highly versatile, allowing for both 2D and 3D operations, making them ideal for prototypes that require high precision. Milling machines can process a variety of materials, including metals, plastics, and composites, which are essential for creating functional prototypes that mirror the final product.
Milling is especially useful when producing intricate parts that require fine details, such as slots, holes, or complex geometries. The ability to use different tools and speeds also gives CNC mills flexibility in achieving the desired surface finishes and tolerances.
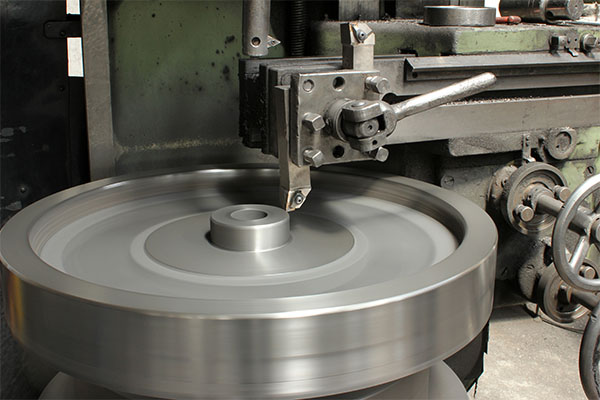
CNC Lathes
CNC lathes are essential for producing cylindrical or round parts with high precision. Lathes use a rotating piece of material, while the cutting tools remain stationary to carve out the desired shape. CNC lathes are ideal for parts such as shafts, bushings, and other components with rotational symmetry. In prototyping, they are commonly used to create parts that require a high degree of accuracy and surface finish.
While CNC lathes are best suited for simple geometries, they can also be used for more advanced machining operations when equipped with additional tooling options. This makes them an indispensable tool in a CNC prototyping shop.
Other CNC Machines
In addition to milling machines and lathes, there are other CNC machines that play a vital role in prototyping. CNC routers, for example, are often used for cutting larger parts or sheets of material, particularly in industries such as woodworking or composites. Electrical Discharge Machines (EDM) are used to cut hard materials, and they are ideal for producing intricate details or complex geometries that might otherwise be difficult to machine using conventional methods.
Each CNC machine type offers specific benefits depending on the nature of the prototype and the material being used. The versatility of CNC machines ensures that they can handle a broad range of prototyping tasks across various industries.
Materials Used in CNC Prototype Machining
Common Materials for CNC Prototyping
CNC prototype machining supports a wide array of materials, making it possible to create prototypes in different fields, such as automotive, medical devices, and consumer electronics. Some of the most common materials used in CNC prototyping include:
- Metals: Aluminum is a popular choice due to its lightweight and machinability. Steel and titanium are often used for parts that require strength, while brass and copper may be selected for their conductive properties.
- Plastics: Plastics like ABS, polycarbonate, and nylon are commonly used for their versatility and ease of machining. They are ideal for creating non-metallic parts or prototypes where weight is a concern.
- Composites: Composites such as carbon fiber and fiberglass are increasingly used in CNC prototyping due to their strength-to-weight ratio. These materials are ideal for industries like aerospace or automotive, where lightweight, durable parts are essential.
Selecting the Right Material for Your Prototype
Choosing the correct material for your CNC prototype is critical to ensuring the part performs as expected. When selecting a material, consider factors such as strength, flexibility, durability, cost, and the desired surface finish. Some materials are easier to machine than others, and understanding their properties will help you select the best option for your needs. Additionally, material availability and the associated costs will influence the overall cost of the project.
It’s essential to work closely with a CNC machining service provider to ensure that the material you choose aligns with the design specifications and functional requirements of the prototype.
Step 1: Designing the Prototype
CAD Software for CNC Prototyping
The first step in the CNC prototype machining process is designing the part using Computer-Aided Design (CAD) software. CAD software allows designers to create detailed 3D models of the part, specifying all of its dimensions, shapes, and features. Some of the most widely used CAD programs in CNC prototyping include SolidWorks, AutoCAD, and Fusion 360.
The design phase is crucial because it determines the overall functionality of the prototype. It’s important to include all necessary details, such as tolerances, surface finishes, and material properties. Having a clear and precise design ensures that the CNC machine can execute the operations accurately, leading to a high-quality prototype.
Design Considerations for CNC Machining
When designing for CNC machining, certain considerations must be taken into account to avoid potential issues during production. One critical factor is designing for manufacturability (DFM), which means creating a design that can be easily and cost-effectively machined. Features such as tight radii, deep pockets, and complex geometries may increase machining time and costs. Additionally, it’s important to understand the limitations of the CNC machine being used to ensure that the design is feasible and that the part can be produced within the given specifications.
Step 2: Converting Your CAD Design to CNC Code (G-code)
What is G-code and Why is it Important?
Once the CAD design is finalized, it needs to be converted into a language that the CNC machine can understand. This is where G-code comes into play. G-code is a standardized programming language that tells the CNC machine exactly how to move, what speed to use, and how much material to remove at each step of the process. It’s a critical part of the CNC machining workflow.
G-code consists of a series of commands that control the movement of the cutting tools, the speed of rotation, and other machining parameters. By converting the CAD design into G-code, the operator ensures that the machine follows the design specifications with high precision.
Software Used for G-code Generation
There are several types of software that help generate G-code from CAD models. CAM (Computer-Aided Manufacturing) software, such as Mastercam, Fusion 360, and CATIA, is used to take the design files and create the corresponding G-code. These programs also help optimize the machining process by generating toolpaths that minimize material waste and reduce machining time. Once the G-code is generated, it can be loaded into the CNC machine, which will execute the required movements to produce the prototype.
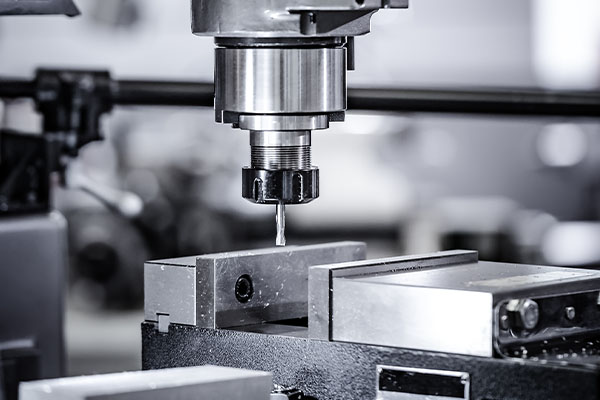
Step 3: Setting Up the CNC Machine
Preparation of Materials and Tools
Before beginning the machining process, it’s essential to prepare the CNC machine and the materials. This includes selecting the appropriate cutting tools based on the material being used and the specific machining operations required. Tools can range from simple end mills to more complex drills and cutters.
The material to be machined must also be securely fastened to the CNC machine’s work table. This ensures that the material remains stable during the cutting process and that the final part meets the required specifications.
Machine Calibration and Testing
Once the machine is set up with the necessary tools and material, it’s important to calibrate the CNC machine to ensure accuracy. Calibration involves checking the alignment of the machine’s components and verifying that the cutting tools are correctly positioned. Operators may run a test cut to verify that the CNC machine is working as expected before beginning the actual prototyping work.
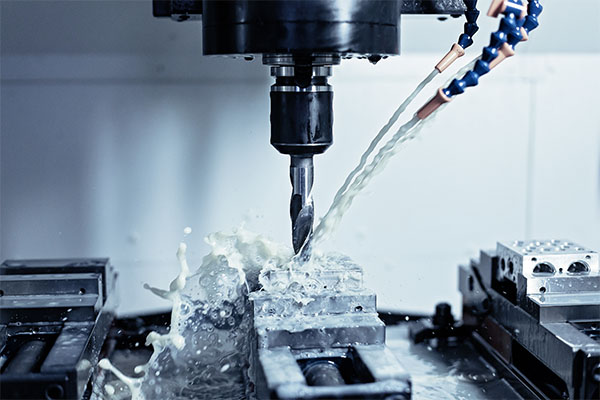
Step 4: CNC Machining Process
The Step-by-Step Machining Process
The CNC machining process typically involves several steps, depending on the complexity of the prototype. First, the material is loaded into the machine, and the program is initiated. The machine then follows the G-code instructions to perform the required operations, such as milling, turning, or drilling. During this stage, the CNC machine will cut away material in precise increments, slowly building the part layer by layer.
As the machining process progresses, the operator may monitor the machine’s performance, checking for any errors or discrepancies that might occur during production. The process is highly automated, allowing for repeatability and high precision, which is crucial in creating accurate prototypes.
Types of CNC Operations Involved
CNC machining involves a variety of operations, each suited to different types of parts. Some of the most common operations include:
- Milling: This involves removing material from the workpiece using rotating cutters.
- Turning: In this process, the material is rotated while a stationary cutting tool removes material.
- Drilling: This process creates holes in the material using rotating drills.
Each operation plays a vital role in shaping the prototype to meet design specifications.
Step 5: Post-Machining Processes
Deburring and Finishing
After machining, the prototype may have rough edges, burrs, or sharp corners that need to be removed. This post-machining process, known as deburring, ensures that the part is safe to handle and meets the desired finish. Depending on the material and design, additional finishing processes may be required to achieve the desired surface texture. Finishes can range from matte to glossy and can significantly affect the prototype’s functionality, particularly in cases where surface properties are crucial.
Inspection and Quality Control
Quality control is an essential step in the post-machining process. Operators use precision measuring tools, such as calipers, micrometers, and coordinate measuring machines (CMM), to ensure that the prototype meets the design specifications. Tolerances, surface finishes, and overall dimensions are carefully checked to ensure that the part performs as intended. If any issues are detected, adjustments are made to the machine or the design to correct the problem.
Benefits of CNC Prototype Machining
Speed and Efficiency
CNC prototype machining offers significant advantages when it comes to speed and efficiency. Once the design is prepared and the machine is set up, the machining process is fast and largely automated. This reduces the time it takes to produce a prototype compared to manual methods, enabling quicker iterations and faster product development. Here’s the deal: rapid prototyping can save you time, which translates into lower overall development costs and a shorter time to market.
Precision and Accuracy
Another benefit of CNC prototype machining is the exceptional precision and accuracy it provides. CNC machines are capable of working within extremely tight tolerances, ensuring that your prototype is manufactured to exact specifications. This is critical for testing the form, fit, and function of a part before moving into mass production. You might be wondering how this affects the prototype testing process. The answer is simple: it ensures that the prototype behaves exactly as intended, reducing the risk of failure during later stages of development.
Customization and Flexibility
CNC machining offers excellent flexibility when it comes to customizing prototypes. The ability to work with various materials and create intricate designs allows for highly tailored parts that meet specific requirements. Whether you’re working with simple or complex geometries, CNC machining can be adapted to suit your needs. This flexibility is invaluable for industries where customized, high-performance parts are essential.
Challenges of CNC Prototype Machining
Material Limitations
Although CNC machining can work with a broad range of materials, some materials are more challenging to machine than others. Harder materials like titanium may require specialized tools or machining processes to achieve the desired results. Additionally, some materials can cause excessive wear on tools or machines, resulting in higher costs or longer production times. But don’t worry—working closely with a machining expert can help you choose the right material and approach for your project.
Complexity of Designs
Complex designs can present a challenge in CNC machining. Parts with intricate geometries, deep cavities, or extremely fine details may require advanced CNC machines or specialized tooling. These additional complexities can increase machining time, cost, and risk of errors. Here’s the deal: understanding the limitations of your CNC machine and working with an experienced team can help mitigate these challenges.
High Initial Setup Costs
One of the potential drawbacks of CNC prototype machining is the initial setup cost. CNC machines require a significant investment in equipment, tooling, and programming. While this cost is often recouped through efficiency gains and faster production, it may still pose a barrier for some businesses. You might be wondering how to minimize these costs—working with experienced providers who offer low setup fees or access to shared machines can help reduce upfront expenses.
How Long Does CNC Prototype Machining Take?
Factors Influencing Lead Time
The lead time for CNC prototyping can vary depending on several factors, including material availability, design complexity, and machine type. Simple designs made from readily available materials may take only a few days to prototype, while more complex projects may take longer. You might be wondering how long the process will take for your specific project. The best way to estimate lead time is to consult with your CNC service provider, who can give you a more accurate timeframe based on your design and materials.
Typical Turnaround Times for Different Prototypes
Turnaround time can vary, but in general, CNC prototyping takes anywhere from a few days to a couple of weeks. For quick-turnaround projects, some CNC shops offer expedited services to ensure that prototypes are delivered as quickly as possible. Here’s the deal: working with a reliable CNC machining partner can help you streamline the process and avoid unnecessary delays.
Comparing CNC Prototype Machining with Other Prototyping Methods
CNC Machining vs. 3D Printing
While 3D printing is gaining popularity as a prototyping method, it does not always match the precision and material capabilities of CNC machining. CNC machines can work with a wider range of materials, including metals and composites, and are capable of producing parts with tighter tolerances. On the other hand, 3D printing is often used for creating quick, low-cost prototypes, especially when material properties and fine details aren’t as critical. You might be wondering which method is right for your project. If you need high precision and durability, CNC machining is the better choice. But if you’re working with simpler geometries or need something fast and affordable, 3D printing might be a better fit.
CNC Machining vs. Injection Molding
Injection molding is another popular method for prototyping, particularly for creating plastic parts. However, it involves significant setup costs and is typically better suited for mass production. CNC machining, on the other hand, offers flexibility for small runs and is ideal for prototypes that need to be tested quickly and iterated upon. Here’s the deal: CNC machining is often more cost-effective and faster when you need a single prototype or a small batch for testing.
Real-World Applications of CNC Prototype Machining
Industries Using CNC Prototyping
CNC prototyping is used in various industries to develop new products, test designs, and refine concepts. The automotive industry, for example, relies on CNC prototyping to create functional parts for vehicle prototypes, while the aerospace industry uses it to produce complex components for aircraft. Medical device manufacturers also use CNC machining to create prototypes of implants and surgical tools. Here’s the deal: CNC prototyping serves a wide range of applications, from everyday consumer products to highly specialized medical or aerospace components.
Famous Companies That Rely on CNC Prototyping
Leading companies in technology, automotive, and aerospace industries rely on CNC prototyping to accelerate product development. For instance, companies like Tesla and Boeing use CNC machining to produce highly accurate parts for their prototypes. You might be wondering how CNC prototyping fits into larger production processes—many of these companies use CNC prototypes to test new designs and make adjustments before committing to full-scale manufacturing.
Cost Considerations for CNC Prototype Machining
Factors That Impact CNC Machining Costs
Several factors contribute to the cost of CNC prototyping, including material choice, complexity of the design, and machining time. High-end materials like titanium or specialized composites may increase the cost of the prototype. Additionally, complex designs with fine details or multiple operations may require more machining time, which can also drive up costs. You might be wondering how to manage these costs—working with an experienced CNC provider can help you optimize your designs to reduce unnecessary machining time and material waste.
How to Estimate CNC Prototyping Costs
The cost of CNC prototyping can vary significantly depending on the project. To get an accurate estimate, it’s essential to provide detailed design files and material specifications to your CNC service provider. Many CNC companies offer online cost calculators or request quotes to help you better understand the costs involved. Here’s the deal: the more detailed and accurate your design, the easier it is to estimate costs and avoid surprises later in the process.
Conclusion and Key Takeaways
CNC prototype machining is an invaluable tool in the product development process, offering speed, accuracy, and flexibility for creating high-quality prototypes. By understanding each step of the process, from design to finished part, you can take full advantage of CNC’s capabilities. Whether you’re prototyping for the automotive, aerospace, or consumer electronics industry, CNC machining provides an efficient solution to turn your ideas into reality quickly and cost-effectively. So, what’s next? If you’re ready to start your own CNC prototyping project, reach out to a trusted CNC provider to discuss your needs and get started today.
FAQ Section
- What is the difference between CNC machining and traditional prototyping methods?
CNC machining is a precise, automated method where a computer controls the movement of tools to shape materials into a prototype. Traditional prototyping methods, like handcrafting or manual machining, rely more on human intervention and may not offer the same level of precision. CNC machining is faster, more consistent, and can handle more complex designs, making it ideal for rapid prototyping.
- How do I choose the right material for my CNC prototype?
Selecting the right material depends on factors such as the prototype’s function, durability, and the properties of the material. Metals like aluminum and steel are often used for strong, functional prototypes, while plastics like ABS or polycarbonate are chosen for their versatility and ease of machining. Consider the physical requirements, such as strength, flexibility, and heat resistance, when making your choice.
- What are the main types of CNC machines used in prototyping?
The main types of CNC machines used in prototyping are CNC milling machines, CNC lathes, and CNC routers. Milling machines are ideal for creating complex shapes and features, while lathes are best for producing round or cylindrical parts. CNC routers are used for larger parts or materials that don’t require the precision of milling machines.
- What software do I need to create a design for CNC prototyping?
Common CAD software like SolidWorks, AutoCAD, and Fusion 360 are used to create 3D models for CNC prototyping. Once your design is created, you’ll need CAM (Computer-Aided Manufacturing) software to convert your CAD files into G-code, which is used to guide the CNC machine in the machining process.
- How long does it typically take to prototype a part using CNC machining?
The time required for CNC prototyping depends on the complexity of the part, the material used, and the machine’s capabilities. Simple parts can be produced within a few days, while more complex prototypes might take a week or more. Working with an experienced provider can help streamline the process and offer quicker turnaround times.
- Is CNC machining suitable for low-volume production or just for prototypes?
CNC machining is suitable for both low-volume production and prototyping. It’s ideal for creating a small batch of parts, which allows for flexibility in testing and iterating designs before moving to mass production. Many industries use CNC for low-volume production due to its cost-effectiveness and precision.
- What should I consider when designing for CNC prototyping?
When designing for CNC prototyping, consider factors like material selection, machining constraints, and tolerances. It’s also essential to think about the ease of machining and ensuring that your design can be easily translated into a G-code. Designing with manufacturability in mind can help avoid issues during the machining process and reduce production costs.
- Can CNC prototypes be used for functional testing?
Yes, CNC prototypes can be used for functional testing. These prototypes are typically made from durable materials and are highly accurate, making them ideal for testing the form, fit, and functionality of a design. This allows engineers to assess how the prototype performs in real-world conditions before committing to mass production.
- How much does CNC prototyping cost?
The cost of CNC prototyping varies depending on factors like the material chosen, the complexity of the design, and the machining time required. Simple prototypes in common materials may cost a few hundred dollars, while more complex designs or exotic materials can increase the price. It’s best to request a quote from a CNC machining provider to get an accurate estimate based on your project specifications.
- What are the limitations of CNC prototype machining?
While CNC machining offers many advantages, it also has limitations. Complex geometries and extremely intricate designs may require specialized machines or tooling, which can increase the cost and production time. Some materials, like very hard alloys or composites, can be challenging to machine, requiring additional processes or equipment. Additionally, the initial setup cost for CNC machines can be high, making small or simple prototypes less cost-effective in some cases.
