परिचय
Installing a CPU cooler is a crucial part of building or maintaining a computer. Whether you’re a seasoned PC builder or a first-time assembler, knowing how to install a CPU cooler correctly ensures your computer runs efficiently without overheating. Overheating can significantly affect the performance and longevity of your PC, so proper cooling is essential for maintaining high performance.
In this guide, we’ll walk you through every step of the installation process. By the end, you’ll know how to install both air and liquid coolers, apply thermal paste, and ensure everything is securely connected. So, let’s dive in!
1. What is a CPU Cooler and Why is It Important?
You might be wondering: why do you need a CPU cooler in the first place? Well, let’s break it down.
A CPU cooler is designed to dissipate heat generated by your CPU during operation. The central processing unit (CPU) is one of the most critical components of your computer, and it can get very hot when under load. Without proper cooling, your CPU can overheat, causing system instability, crashes, or even permanent damage. This is where the cooler steps in—keeping your CPU at a manageable temperature and ensuring it operates efficiently.
There are two main types of CPU coolers: air coolers and liquid coolers. Air coolers use fans to draw heat away from the CPU and expel it into the surrounding air, while liquid coolers use a system of liquid to absorb and transport heat away from the CPU. Both have their advantages and disadvantages, but both are crucial for preventing overheating and maintaining optimal performance.
Now, you might think that any cooler will do, but here’s the kicker: choosing the right cooler for your specific needs is essential. From cooling capacity to noise levels, there are many factors to consider.
Table 1: Comparison of Air and Liquid Coolers
| विशेषता | Air Coolers | Liquid Coolers |
|---|---|---|
| Cooling Capacity | Moderate to high | उच्च |
| शोर का स्तर | Generally quieter | Can be louder due to pump noise |
| Installation Difficulty | Easier to install | More complex setup |
| रखरखाव | Requires occasional cleaning | Requires checking pump and tubing |
| Price | Generally cheaper | More expensive |
2. What Are the Different Types of CPU Coolers?
The next question on your mind is likely: what types of CPU coolers are there? Let’s explore the different options available to you.
There are two primary types of CPU coolers: air coolers और liquid coolers. But within these categories, there are also variations, each suited for specific needs.
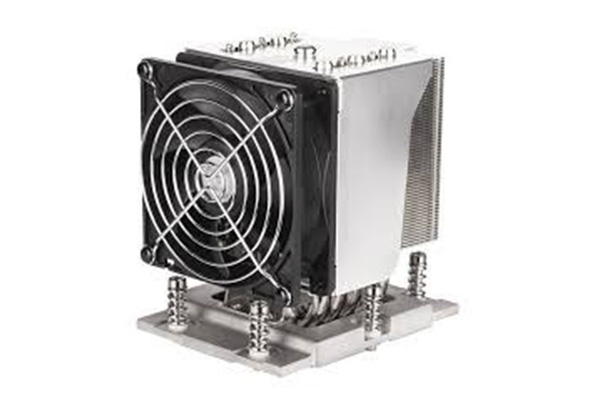
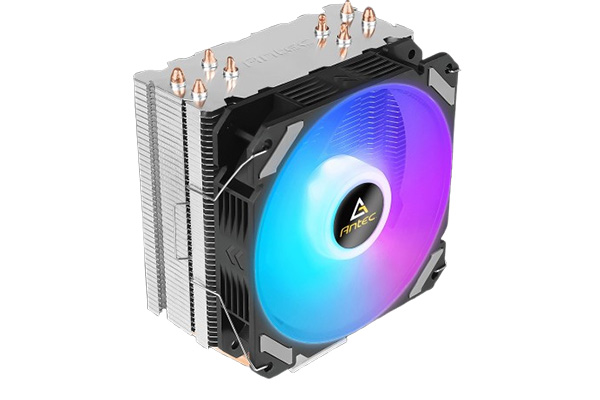
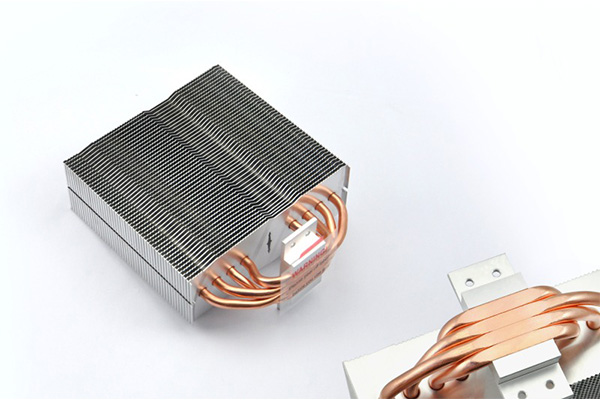
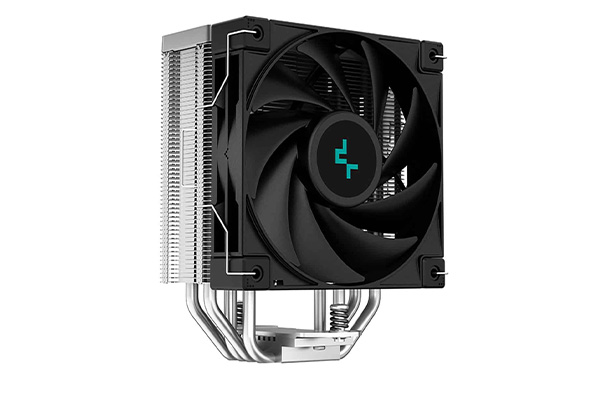
Air Coolers: These are the most common and cost-effective solutions. They consist of a heat sink (usually made of metal, like aluminum or copper) and a fan that helps dissipate the heat. Air coolers are easy to install and generally require less maintenance. They’re a great choice for most users, especially those who don’t want to deal with complex setups or higher costs.
Liquid Coolers: Liquid coolers, also known as AIO (All-In-One) coolers, use a closed-loop system of tubing and a pump to circulate liquid and carry heat away from the CPU. They offer superior cooling performance and are ideal for high-performance systems, especially when overclocking. Liquid coolers come in various sizes, with options for single, dual, and even triple fans, depending on how much cooling you need.
What’s the real story here? If you’re looking for high-end performance and quieter operation, liquid coolers might be your best bet. But if you want an easier, budget-friendly option that still provides excellent cooling, air coolers are the way to go.
Table 2: Types of CPU Coolers and Their Pros/Cons
| Cooler Type | पेशेवरों | Cons |
|---|---|---|
| Air Coolers | Affordable, easy to install, reliable | Limited cooling capacity for overclocking |
| Liquid Coolers | Superior cooling, quieter, efficient | More expensive, complex installation |
3. How Do I Know When My CPU Cooler Needs to Be Replaced?
This is where it gets interesting—how do you know when your CPU cooler is no longer doing its job?
Your CPU cooler might need replacing if you notice signs of poor cooling performance. Here are some red flags to watch out for:
- Overheating: If your PC starts shutting down randomly or the system is slow, it could be a sign that the CPU cooler is struggling to maintain proper temperatures. You can monitor CPU temperatures with software tools like HWMonitor or Core Temp. If your CPU temperature regularly exceeds 80°C, it’s time to investigate the cooler.
- Excessive noise: A noisy cooler isn’t necessarily a bad sign, but if you notice a loud, whirring sound coming from the fan or pump, it could indicate wear and tear. Over time, the fan blades or the liquid in the pump may degrade, causing unnecessary noise.
- Physical damage: Check your cooler for any visible signs of damage. Bent fins or broken fans can seriously affect cooling performance. If the cooler appears to be physically compromised, it’s time for a replacement.
So, what do you do if you notice these signs? You might think replacing the cooler would be difficult, but here’s the kicker—it’s actually a straightforward process if you know what you’re doing.
Table 3: Signs Your CPU Cooler Needs Replacement
| Sign | What It Means |
|---|---|
| Overheating | Poor cooling performance |
| Excessive Noise | Worn-out fan or pump |
| Physical Damage | Compromised cooler functionality |
4. What Tools Do You Need to Install a CPU Cooler?
Now that you understand the importance of a CPU cooler and how to identify when it’s time to replace it, let’s move on to the next step: installation.
Before you start, it’s important to make sure you have the right tools. Here’s a list of the essential tools you’ll need for the job:
- Thermal paste: This is crucial for ensuring proper heat transfer between the CPU and the cooler.
- Screwdriver: You’ll need a Phillips screwdriver to secure the cooler in place.
- Cleaning supplies: Before you install a new cooler, it’s important to clean the CPU and surrounding area to ensure optimal heat transfer. A microfiber cloth and isopropyl alcohol will do the trick.
- Cable ties or Velcro strips: These are used to manage cables and prevent any obstruction to airflow.
What’s the real story here? Having the right tools at hand ensures a smooth installation process. Without them, you could face delays or, worse, damage to your components.
Table 4: Essential Tools for Installing a CPU Cooler
| औजार | उद्देश्य |
|---|---|
| Thermal Paste | Ensures proper heat transfer |
| Screwdriver | Secures the cooler in place |
| Cleaning Supplies | Prepares the surface for installation |
| Cable Ties/Velcro Strips | Organizes cables for optimal airflow |
5. How Do I Choose the Right CPU Cooler for My PC?
Choosing the right CPU cooler isn’t a one-size-fits-all decision. Several factors will influence your choice, including CPU socket type, cooling requirements, and your budget. Here’s what you need to consider:
- Compatibility: First, check your CPU socket type. Different coolers are compatible with different socket types, so you’ll need to ensure your cooler matches your motherboard’s specifications. This is where it gets tricky—if you have an older or uncommon socket type, you may need to search for a cooler that explicitly supports it.
- Cooling Capacity: The more powerful your CPU, the better your cooling solution should be. If you plan to overclock your CPU or use it for heavy tasks like gaming or video rendering, a liquid cooler with a higher cooling capacity may be necessary. On the other hand, an air cooler is sufficient for lower-powered CPUs.
- Noise Level: Let’s face it: nobody wants a noisy computer. Be sure to check the noise level of the cooler you’re considering. Liquid coolers tend to be quieter, but some air coolers can also operate quietly if you choose one with large, low-speed fans.
Ready for the good part? Choosing the right CPU cooler is crucial to ensuring your system runs smoothly, so don’t rush the decision.
Table 5: How to Choose the Right CPU Cooler
| कारक | Considerations |
|---|---|
| Compatibility | Ensure compatibility with your CPU socket |
| Cooling Capacity | Choose based on CPU performance and overclocking needs |
| Noise Level | Opt for quieter models to reduce noise |
6. How to Prepare Your PC for CPU Cooler Installation?
Before diving into the installation process, it’s essential to prepare your PC properly. Here’s the thing: preparation is key to ensuring a smooth and successful installation. If you skip these preliminary steps, you might encounter issues down the road, such as improper installation or, worse, hardware damage.
First, power off your PC and unplug it from the electrical outlet. This is a crucial step because working with electrical components while the PC is powered on can lead to serious damage. Disconnect all cables and peripherals, including the monitor, keyboard, and mouse.
Next, remove the side panel of your PC case to gain access to the internal components. Depending on your case design, this might involve removing screws or using a latch mechanism. Once the panel is off, take a moment to inspect the inside of your case for dust or debris that could interfere with airflow. Cleaning your case at this point is an excellent idea. Compressed air or a soft brush can help remove dust from components.
When preparing to install the cooler, you’ll also need to remove the old CPU cooler, if applicable. If you’re upgrading or replacing an old cooler, carefully detach it by loosening the screws or fasteners holding it in place. Be cautious with the thermal paste—if it’s stuck to the CPU, it might require gentle wiggling to release.
This is where it gets interesting: you’ll want to clean the surface of the CPU thoroughly before installing the new cooler. Use isopropyl alcohol (preferably 90% or higher) and a microfiber cloth to wipe away any remaining thermal paste. This ensures maximum heat transfer between the CPU and the new cooler.
Table 6: Preparing Your PC for CPU Cooler Installation
| कदम | कार्रवाई |
|---|---|
| Power off and unplug | Turn off your PC and disconnect cables |
| Remove side panel | Gain access to internal components |
| Clean the case | Remove dust with compressed air or a brush |
| Remove old CPU cooler | Detach the cooler carefully |
| Clean the CPU surface | Wipe away thermal paste with alcohol and cloth |
7. What Are the Basic Steps for Installing an Air CPU Cooler?
Now that your PC is prepared and ready, it’s time for the fun part: installing the air cooler. This process is relatively straightforward but requires attention to detail to ensure that the cooler is securely mounted and effectively dissipating heat.
Step 1: Apply thermal paste. Begin by applying a small, pea-sized amount of thermal paste to the center of the CPU. This is crucial for ensuring optimal heat transfer from the CPU to the cooler. Don’t overdo it with the paste—too much can make a mess and affect cooling efficiency.
Step 2: Mount the cooler. Align the air cooler’s base with the CPU. Most air coolers have a mounting bracket or screws that will secure the cooler to the CPU socket. Once aligned, press the cooler firmly onto the thermal paste, ensuring a good connection. The cooler should be evenly distributed across the CPU’s surface for the best heat transfer.
Step 3: Attach the fan. Many air coolers come with a fan that helps to push air through the heatsink. Position the fan on the cooler, aligning it with the appropriate mounts. Secure it with screws or clips. Make sure the fan is oriented to blow air out of the case, not into it, to prevent creating a dead spot for airflow.
Step 4: Connect the fan. The fan will need to be connected to the motherboard for power. Locate the fan header on the motherboard, usually labeled “CPU_FAN,” and connect the fan’s cable to this port. Ensure the cable is neatly managed and doesn’t obstruct airflow.
Step 5: Final check. Before powering up your system, double-check the installation. Ensure the cooler is tightly secured, the fan is connected properly, and the thermal paste has been applied correctly. Power on the PC and monitor the CPU temperature to verify that the cooler is working properly.
Ready for the good part? Now that you’ve installed the air cooler, you should see a noticeable improvement in CPU temperature. But, of course, the real test will be running demanding applications like gaming or video rendering.
Table 7: Steps for Installing an Air CPU Cooler
| कदम | कार्रवाई |
|---|---|
| थर्मल पेस्ट लगायें | Add a small, pea-sized amount to the CPU |
| Mount the cooler | Secure the cooler firmly on the CPU |
| Attach the fan | Position and secure the fan |
| Connect the fan | Plug the fan into the CPU fan header on the motherboard |
| Final check | Ensure everything is tight and well connected |
8. What Are the Steps for Installing a Liquid CPU Cooler?
If you’re opting for a liquid CPU cooler, the installation process is a bit more involved, but it offers superior cooling performance. Here’s what you need to do to get it right.
Step 1: Prepare the radiator and pump. Liquid coolers consist of a pump, tubes, and a radiator. Start by mounting the radiator to the top or front of your case, depending on your case design. Use the included screws or brackets to secure it. Liquid coolers are typically installed with fans either in a push or pull configuration, so make sure the airflow is directed out of the case.
Step 2: Apply thermal paste. Like with air coolers, you’ll need to apply thermal paste to the CPU. Apply a small, even amount in the center of the CPU, just like you would for an air cooler.
Step 3: Attach the pump to the CPU. The pump portion of the liquid cooler typically attaches directly to the CPU socket. Align the pump with the CPU and press it firmly into place. Secure it using screws or brackets. The pump should make even contact with the CPU to ensure optimal heat transfer.
Step 4: Connect the tubes. The tubes from the radiator will need to be attached to the pump. These tubes are where the coolant flows, so make sure they are securely connected. There should be no kinks or bends in the tubes that could restrict coolant flow.
Step 5: Final check and test. Once everything is connected, power on your system and check the coolant levels. Most liquid coolers come pre-filled, but it’s important to ensure that everything is running smoothly. Check for leaks, odd noises, or abnormal behavior from the pump or fans.
Now here’s the kicker—liquid coolers may require periodic maintenance, like checking coolant levels or cleaning the radiator. Make sure to keep an eye on these factors to prolong the lifespan of your cooler.
Table 8: Steps for Installing a Liquid CPU Cooler
| कदम | कार्रवाई |
|---|---|
| Prepare radiator and pump | Mount the radiator and secure the pump |
| थर्मल पेस्ट लगायें | Add thermal paste to the center of the CPU |
| Attach the pump | Secure the pump onto the CPU socket |
| Connect the tubes | Attach the tubes to the radiator and pump |
| Final check and test | Check coolant levels and ensure proper functioning |
9. How to Apply Thermal Paste Correctly?
One of the most critical steps in the cooler installation process is applying thermal paste. But here’s the thing: you can’t just slather it on and hope for the best. Proper application is key to ensuring that your CPU and cooler make proper contact for optimal heat transfer.
Step 1: Clean the CPU surface. Before applying new thermal paste, ensure the CPU surface is clean and free of old paste. Use isopropyl alcohol and a microfiber cloth to clean the area thoroughly.
Step 2: Apply a small amount of thermal paste. The amount of thermal paste matters. Too much paste can spill over the sides, causing poor heat transfer and even potential damage. A small, pea-sized amount in the center of the CPU is all you need.
Step 3: Spread the paste evenly. Some users prefer to spread the paste evenly with a card or tool, but others rely on the pressure from the cooler itself to do this. Both methods work, but applying a uniform layer of paste ensures the best contact.
Now, what’s the real story? Proper thermal paste application can make all the difference in your system’s performance and cooling efficiency, so don’t rush it!
Table 9: How to Apply Thermal Paste
| कदम | कार्रवाई |
|---|---|
| Clean the CPU surface | Use alcohol and a microfiber cloth |
| थर्मल पेस्ट लगायें | Place a small, pea-sized amount in the center |
| Spread the paste evenly | Spread it with a tool or let the cooler do the work |
10. How to Mount a CPU Cooler Securely?
Mounting the CPU cooler securely is essential for ensuring it functions properly. If the cooler is loose or unevenly applied, your CPU will not cool as efficiently, leading to overheating and performance issues.
Step 1: Align the cooler with the CPU socket. Whether you’re using an air or liquid cooler, start by aligning the cooler with the CPU socket. This may involve matching mounting holes or using a specific bracket for your cooler.
Step 2: Tighten the screws or fasteners. Once the cooler is in position, begin tightening the screws or fasteners in a crisscross pattern. This ensures even pressure across the CPU and cooler base, promoting uniform heat distribution.
Step 3: Ensure a secure connection. After securing the cooler, give it a gentle wiggle to ensure it’s firmly in place. It should not shift or move under light pressure. If there’s any movement, re-tighten the screws or check for proper alignment.
So, here’s the kicker—over-tightening the screws can cause damage to your CPU or cooler. Always tighten them just enough to ensure a secure fit.
Table 10: Mounting a CPU Cooler
| कदम | कार्रवाई |
|---|---|
| Align the cooler | Match mounting holes or use specific bracket |
| Tighten screws or fasteners | Use a crisscross pattern for even pressure |
| Ensure secure connection | Gently test for any movement |
11. How Do I Connect the CPU Cooler to My Motherboard?
Connecting your CPU cooler to the motherboard is crucial for proper power and performance. Let’s break down the connection process.
Step 1: Locate the fan header. On most motherboards, the fan header for the CPU cooler is labeled as “CPU_FAN” or something similar. This is where you’ll connect the fan’s power cable.
Step 2: Plug in the fan cable. Once you’ve located the header, plug the fan’s cable into it. Ensure the connector is seated securely to avoid loose connections. If your cooler has multiple fans, you may need to use a fan splitter to connect them all to a single header.
Step 3: Manage the cables. After connecting the fan(s), use cable ties or Velcro strips to keep the cables organized and out of the airflow path. Proper cable management helps optimize airflow and reduces the risk of damage from moving parts.
Here’s the kicker: don’t forget to check the cooler’s RPM settings in the BIOS. You can control the fan speed and ensure that the cooler is running at the optimal speed for your needs.
Table 11: Connecting CPU Cooler to the Motherboard
| कदम | कार्रवाई |
|---|---|
| Locate the fan header | Find the CPU_FAN header on the motherboard |
| Plug in the fan cable | Connect the cable securely |
| Manage the cables | Use ties to organize cables for airflow |
12. How to Test If Your CPU Cooler is Working Properly?
After installing your cooler, you’ll want to ensure it’s working properly. Let’s take a look at how to test its functionality.
Step 1: Monitor CPU temperature. Use software like HWMonitor or Core Temp to keep an eye on the CPU temperature during heavy use. Idle temperatures should be around 30-40°C, and under load, they shouldn’t exceed 80-85°C.
Step 2: Check for unusual noises. If the cooler is making a strange noise, it could indicate a problem with the fan or pump. Listen carefully for any grinding or high-pitched noises, which may suggest the cooler is malfunctioning.
Step 3: Verify fan operation. Ensure that the fan or pump is running smoothly. The fan should spin without hesitation, and the pump (if you’re using a liquid cooler) should be circulating coolant without noise or vibration.
So, what’s the real story? If the temperatures are within a safe range and everything sounds normal, your cooler is working properly. Keep an eye on the system over time to ensure it continues to perform optimally.
Table 12: Testing Your CPU Cooler
| कदम | कार्रवाई |
|---|---|
| Monitor CPU temperature | Use software to check idle and load temperatures |
| Check for unusual noises | Listen for grinding or high-pitched sounds |
| Verify fan operation | Ensure the fan is running smoothly |
13. How Can I Ensure My CPU Cooler Lasts Longer?
Want your CPU cooler to serve you well for years to come? Proper maintenance is key.
Step 1: Clean your cooler regularly. Dust buildup is one of the biggest enemies of cooling performance. Use compressed air to blow out dust from the fan and heatsink. For liquid coolers, make sure the radiator is free from obstructions as well.
Step 2: Monitor the pump and fan speed. If you’re using a liquid cooler, it’s essential to check the pump regularly. A failing pump can lead to poor cooling performance. Fans should also be checked periodically to ensure they’re spinning at the correct speed.
Step 3: Check coolant levels. For liquid coolers, it’s important to monitor coolant levels. Over time, the coolant can evaporate or degrade, reducing the cooler’s efficiency. Some coolers allow for easy refills, while others need to be replaced.
Here’s the kicker: taking these small steps can extend the life of your cooler and keep your PC running smoothly for a long time.
Table 13: Maintaining Your CPU Cooler
| कदम | कार्रवाई |
|---|---|
| कूलर को नियमित रूप से साफ करें | Use compressed air to remove dust |
| Monitor pump and fan speed | Check pump operation and fan speed |
| Check coolant levels | Ensure proper coolant levels in liquid coolers |
14. What Are Common Mistakes to Avoid When Installing a CPU Cooler?
Installing a CPU cooler may seem straightforward, but it’s easy to make mistakes. Let’s go over some of the most common ones.
Mistake 1: Over-tightening screws. While it’s important to secure the cooler, over-tightening can damage the CPU or cooler. Always tighten screws just enough to ensure a secure fit.
Mistake 2: Using too much thermal paste. A common mistake is applying too much thermal paste, which can spill over and negatively affect heat transfer. A pea-sized amount is sufficient.
Mistake 3: Improper fan orientation. Make sure your cooler’s fan is oriented to blow air out of the case, not into it. Incorrect fan orientation can lead to poor airflow and increased temperatures.
So, what do you do? Avoid these mistakes by taking your time and following the steps carefully.
Table 14: Common CPU Cooler Installation Mistakes
| Mistake | What It Means |
|---|---|
| Over-tightening screws | Damages the cooler or CPU |
| Using too much thermal paste | Leads to inefficient cooling |
| Improper fan orientation | Causes poor airflow and higher temperatures |
15. How Can I Improve My PC’s Cooling Performance?
Want to take your cooling game to the next level? Here’s how.
Step 1: Add more case fans. Case fans improve airflow, helping your CPU cooler perform better. Ensure your case has proper intake and exhaust fans to maintain optimal airflow.
Step 2: Upgrade your cooler. If you’re running a high-performance system, consider upgrading to a more powerful air or liquid cooler. This can significantly improve cooling performance, especially if you plan to overclock your CPU.
Step 3: Improve cable management. Poor cable management can block airflow, reducing cooling efficiency. Use cable ties or Velcro strips to keep cables organized and out of the airflow path.
Ready for the good part? Improving your PC’s cooling performance doesn’t have to be expensive. Sometimes, small adjustments like adding fans or cleaning up cables can make a huge difference.
Table 15: Improving Your PC’s Cooling Performance
| कदम | कार्रवाई |
|---|---|
| Add more case fans | Install additional intake or exhaust fans |
| Upgrade your cooler | Choose a higher-performance air or liquid cooler |
| Improve cable management | Use cable ties to organize and improve airflow |
निष्कर्ष
In conclusion, installing a CPU cooler is essential for keeping your PC running smoothly and efficiently. Whether you choose an air or liquid cooler, the most important thing is selecting the right one for your system and ensuring it’s installed correctly. By following the steps outlined in this guide, you can maintain optimal cooling and performance for your CPU. Don’t forget to monitor your system temperatures regularly to ensure your cooler is still performing as expected. Happy building!
अक्सर पूछे जाने वाले प्रश्न अनुभाग
प्रश्न 1: सीपीयू कूलर क्या है?
A CPU cooler is a device that helps dissipate heat generated by the CPU, preventing overheating and ensuring optimal performance.
प्रश्न 2: How does a CPU cooler work?
A CPU cooler draws heat away from the CPU and expels it into the surrounding environment, either through air or liquid, to maintain a safe operating temperature.
प्रश्न 3: How do I install a CPU cooler?
To install a CPU cooler, clean the CPU, apply thermal paste, attach the cooler, and secure it with screws, ensuring proper connections to the motherboard.
प्रश्न 4: Why is thermal paste important for CPU cooling?
Thermal paste ensures efficient heat transfer between the CPU and cooler, preventing thermal throttling and maintaining optimal performance.
प्रश्न 5: How often should I replace my CPU cooler?
Replace your CPU cooler if it shows signs of physical damage, excessive noise, or failure to cool the CPU effectively, which can lead to overheating and system instability.
