Wstęp
When it comes to maintaining and upgrading your PC, one of the key tasks is knowing how to safely remove your CPU cooler. This article walks you through the necessary steps, from preparation to the actual removal process, all while ensuring you don’t damage your components. Whether you’re upgrading your cooling system, cleaning the components, or replacing thermal paste, safely removing your CPU cooler is an essential skill for any computer enthusiast or professional. Ready to learn how? Let’s dive in.
1. Why Do You Need to Remove Your CPU Cooler?
Removing your CPU cooler might sound like an unnecessary step, but it’s actually crucial for several reasons. Whether you’re upgrading your system, replacing a failing cooler, or performing routine maintenance, removing your CPU cooler is a key part of the process.
But here’s the kicker… it’s not just about replacing the cooler. It’s about ensuring that your CPU remains at the optimal temperature for high performance. Over time, dust, grime, and thermal paste can accumulate on the cooler, reducing its efficiency. Cleaning or replacing your cooler can help avoid overheating issues and maintain your system’s performance.
So, what are the main reasons you might need to remove the CPU cooler? The most common reasons include:
● Wymiana pasty termoprzewodzącej: Over time, thermal paste can degrade, leading to poor heat transfer. Replacing it can significantly improve cooling performance.
● Upgrading to a better cooler: As your system evolves, you might need a more powerful cooler to handle increased heat output.
● Routine maintenance: Dust and debris can accumulate on the cooler, reducing its effectiveness. A thorough cleaning can improve airflow and thermal performance.
Now, let’s move to the next crucial step—how do you prepare to remove the cooler?
| Reason for Removal | Opis |
|---|---|
| Wymiana pasty termoprzewodzącej | Prevent overheating and improve cooling. |
| Upgrading the cooler | Better performance for more demanding tasks. |
| Routine maintenance | Clean dust and debris to maintain performance. |
2. What Tools Do You Need to Remove a CPU Cooler?
Before diving into the removal process, it’s essential to gather the right tools. The correct tools can make the process easier and prevent any accidental damage to your components. Ready for the good part? Here’s a list of the basic tools you’ll need:
● Screwdriver: Most CPU coolers are held in place with screws. A screwdriver (usually Phillips-head) will be essential for unscrewing the cooler.
● Thermal paste remover: Once the cooler is removed, you’ll need to clean off any old thermal paste. A specialized thermal paste remover or rubbing alcohol works best.
● Antistatic wristband: This is critical for preventing static electricity from damaging sensitive computer components during the removal process.
● Tweezers: Useful for removing small screws or clips if your cooler has any. They’re also great for handling delicate components.
These are the basic tools, but depending on your CPU cooler model, you may need additional items like socket adapters or a cooling fan removal kit.
What’s the real story with safety, though? Well, always ensure your system is powered off, and unplugged before starting the process.
| Narzędzie | Zamiar |
|---|---|
| Screwdriver | Unscrew and detach the cooler from the CPU. |
| Thermal paste remover | Clean off old thermal paste for optimal cooling. |
| Antistatic wristband | Prevent static discharge from damaging parts. |
| Tweezers | Remove small screws or delicate components. |
3. How to Prepare for CPU Cooler Removal?
Now that you’ve gathered your tools, it’s time to prepare your system. Preparing for CPU cooler removal isn’t just about having the right tools—it’s about ensuring the whole process is safe and smooth.
So, what should you do first? The most important step is to shut down and unplug your system. This might seem like a no-brainer, but it’s essential for safety. Don’t just turn off your computer—unplug the power cord to ensure there’s no electricity running through the system while you’re working.
Next, discharge any static electricity. Static can damage sensitive computer parts, so wear an antistatic wristband or touch a metal object to ground yourself before working on your PC.
Here’s the step you might not think of… clear your workspace. Make sure you have enough room to work comfortably and that all your tools are within reach. Working in a cramped, cluttered space can lead to mistakes or accidents.
With these preparations in place, you’re ready to start removing your CPU cooler.
| Preparation Step | Zamiar |
|---|---|
| Power down and unplug system | Prevent electrical damage during removal. |
| Discharge static electricity | Protect components from static discharge. |
| Clear workspace | Ensure a safe and efficient removal process. |
4. How Do You Disconnect the CPU Cooler from the Motherboard?
Now it’s time to get your hands dirty! The first step in the actual cooler removal process is to disconnect it from the motherboard.
But here’s the kicker… CPU coolers come in all shapes and sizes, so how they attach to the motherboard can vary. Some coolers use screws, while others use clips or even bolts. So, what’s the method? Here’s a step-by-step guide:
- Locate the screws or clips: Depending on your cooler type, find the screws or clips holding the cooler in place. These are usually located at the edges of the cooler or around the mounting bracket.
- Loosen the screws or unlock the clips: Using a screwdriver or your hands, begin loosening the screws. If your cooler uses clips, gently unclip them without applying too much force.
- Detach any cables: Some coolers have cables that connect to the motherboard for power or fan control. Carefully disconnect these cables before proceeding.
- Lift the cooler off the CPU: Once the screws and cables are removed, carefully lift the cooler off the CPU. Don’t twist or pull too hard—if it feels stuck, check for any remaining attachments.
What happens next? Well, you need to clean your CPU and cooler before reapplying thermal paste.
| Krok | Działanie |
|---|---|
| Locate screws or clips | Find the mounting points holding the cooler. |
| Loosen screws or clips | Unscrew or unclip the cooler from the CPU. |
| Detach cables | Unplug any attached cables for fan control. |
| Lift the cooler off | Gently lift off the cooler without twisting. |
5. What Is the Correct Way to Remove the CPU Cooler?
The right technique for removing your CPU cooler can make all the difference. Not only does it prevent damage to the cooler and the CPU, but it also ensures you’re ready for reinstallation.
Ready for the good part? Here’s the correct process:
- Check for any obstructions: Before you start lifting the cooler, make sure there’s nothing blocking your way. You don’t want to force anything if it’s stuck.
- Loosen the thermal paste bond: Thermal paste can cause the cooler to stick to the CPU. Gently twist or wiggle the cooler to break the bond. If the cooler resists, don’t yank—apply gentle, consistent pressure.
- Lift the cooler straight off: Once the cooler is free, lift it off the CPU in a straight motion. Avoid twisting or bending it, as this could damage the CPU or the cooler.
Now, it’s time to clean your CPU and cooler for a fresh start. But how do you clean them properly?
| Krok | Działanie |
|---|---|
| Check for obstructions | Ensure nothing is in the way of the cooler’s removal. |
| Loosen thermal paste bond | Apply gentle force to break the paste’s bond. |
| Lift the cooler straight off | Remove the cooler carefully without twisting. |
6. How to Clean Your CPU and Cooler After Removal?
Cleaning your CPU and cooler after removal is a crucial step that can significantly improve your system’s performance. Ready for the good part? Here’s how to clean them thoroughly:
- Clean the CPU: Use a lint-free cloth or paper towel along with some rubbing alcohol (preferably 70% or higher) to wipe away any thermal paste residue from the CPU. Apply the alcohol directly to the cloth, not the CPU, and gently clean the surface.
- Clean the cooler: The cooler also needs a good cleaning. Use compressed air or a microfiber cloth to wipe off any dust, debris, or old thermal paste. Be gentle, especially if you have a liquid cooler with a fan.
- Inspect the cooler: While cleaning, take a moment to inspect the cooler for damage. Check for cracks, bent fins, or anything that might prevent it from functioning properly.
What’s the next step? Reapply fresh thermal paste for optimal heat transfer.
| Krok | Działanie |
|---|---|
| Clean the CPU | Wipe off old thermal paste using rubbing alcohol. |
| Clean the cooler | Remove dust and thermal paste from the cooler. |
| Inspect the cooler | Check for any physical damage or wear. |
7. What Common Mistakes Should You Avoid When Removing a CPU Cooler?
Even the most seasoned PC enthusiasts can make mistakes when removing a CPU cooler. Avoiding these mistakes is key to ensuring that your cooler removal goes smoothly.
What’s the real story here? The most common mistakes include:
● Using too much force: If the cooler doesn’t come off easily, don’t force it. This can damage the cooler or the CPU. Instead, try gently twisting it to break the thermal paste bond.
● Not cleaning thoroughly: Failing to clean off the old thermal paste from the CPU or cooler can lead to poor heat transfer, which could cause your system to overheat.
● Not properly reattaching the cooler: When reinstalling the cooler, ensure it’s seated properly on the CPU and all screws or clips are securely fastened. If it’s loose, it won’t provide proper cooling.
Want to avoid these mistakes? Follow the right steps and take your time. Don’t rush through the process.
| Błąd | How to Avoid |
|---|---|
| Using too much force | Twist gently, don’t yank the cooler. |
| Not cleaning thoroughly | Clean both the CPU and cooler properly. |
| Not properly reattaching | Double-check that the cooler is securely installed. |
8. How Do You Reapply Thermal Paste After Cooler Removal?
Thermal paste is essential for ensuring efficient heat transfer between your CPU and cooler. After you remove your cooler, it’s necessary to apply fresh thermal paste for the best results.
Here’s where it gets interesting… Applying thermal paste isn’t as simple as just slapping some on the CPU. Here’s the right way to do it:
- Clean the CPU: Before applying new paste, ensure the surface of the CPU is completely clean from any old thermal paste.
- Apply a small amount: A small, pea-sized amount of thermal paste is all you need. Don’t overdo it, as too much paste can cause heat issues.
- Spread the paste: While some people let the cooler spread the paste, others prefer to spread it manually with a plastic card or a thermal paste spreader.
Ready to get your cooler back on? Let’s move on to reinstalling it.
| Krok | Działanie |
|---|---|
| Clean the CPU | Wipe off all old thermal paste from the CPU. |
| Apply a small amount | Apply a pea-sized amount of thermal paste. |
| Spread the paste | Optionally, spread the paste manually or let the cooler do it. |
9. How to Reinstall Your CPU Cooler After Removal?
Reinstalling your CPU cooler is crucial for restoring proper cooling to your system. Here’s the process:
- Align the cooler: Make sure the cooler is aligned with the mounting points on the CPU.
- Apply pressure: Gently apply pressure to secure the cooler in place, ensuring that it sits firmly on top of the CPU.
- Screw in the cooler: Once the cooler is properly positioned, tighten the screws in a cross pattern to ensure even pressure across the cooler.
- Reconnect cables: Reconnect any cables that were disconnected during the removal process.
With the cooler installed, you’re ready to check for any cooling issues.
| Krok | Działanie |
|---|---|
| Align the cooler | Ensure the cooler is lined up with the CPU. |
| Apply pressure | Gently secure the cooler onto the CPU. |
| Screw in the cooler | Tighten screws evenly to secure the cooler. |
10. How to Know If the CPU Cooler Is Properly Installed?
You might be wondering… How do I know if my cooler is installed properly?
Here’s a checklist to help you:
● Check for tightness: Ensure the cooler is firmly secured on the CPU. If it’s too loose, it won’t cool effectively.
● Monitor system temperatures: After reinstalling the cooler, monitor your system temperatures. If they’re too high, you might need to adjust the cooler.
● Look for airflow: If your cooler has fans, ensure they’re spinning properly. Poor airflow could indicate an issue with the installation.
What happens next? Let’s move on to understanding the types of CPU coolers available.
| Checkpoint | Działanie |
|---|---|
| Tightness | Ensure the cooler is securely attached. |
| System temperature | Monitor CPU temperature after reinstallation. |
| Airflow | Check if the cooler’s fans are working properly. |
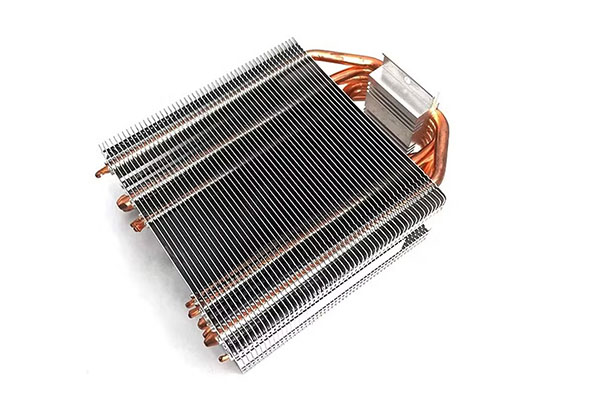
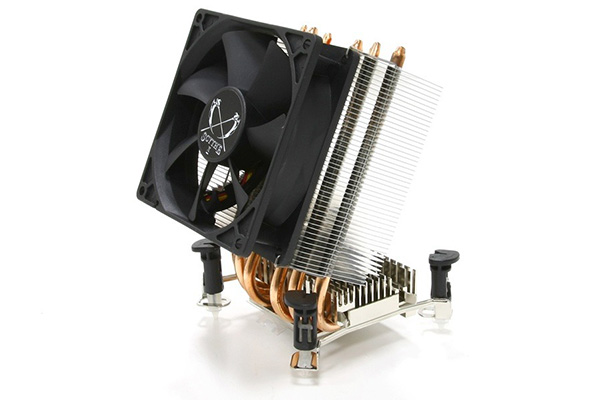
11. What Are the Different Types of CPU Coolers?
There are several types of CPU coolers available, and each comes with its own set of advantages and disadvantages. Ready to dive in?
- Air coolers: These are the most common and affordable types of coolers. They use a heatsink and a fan to dissipate heat away from the CPU.
- Liquid coolers: Liquid coolers are more efficient at cooling and tend to be quieter than air coolers. They use a closed-loop system that circulates coolant through a radiator.
- Custom liquid cooling: For extreme performance and customization, enthusiasts often use custom liquid cooling systems that are tailor-made to their system’s needs.
So, which one is right for you? It depends on your needs, but each type offers unique benefits.
| Cooler Type | Pros | Cons |
|---|---|---|
| Air coolers | Affordable, easy to install, reliable. | Can be noisy, less efficient at higher loads. |
| Liquid coolers | Efficient, quieter, looks sleek. | More expensive, harder to install. |
| Custom liquid cooling | Customizable, extreme cooling performance. | Expensive, complex installation. |
12. How to Prevent CPU Cooler Issues in the Future?
Maintaining your CPU cooler is key to ensuring long-lasting performance. Ready for the good part?
Here’s how to keep your cooler in top shape:
● Clean regularly: Dust can accumulate in your cooler and reduce its performance. Cleaning it every few months can help avoid this.
● Check thermal paste: Over time, thermal paste can degrade. Reapply it as necessary to maintain optimal cooling.
● Monitor temperatures: Use software to monitor CPU temperatures. If they start rising, it could be a sign your cooler isn’t working properly.
By following these tips, your CPU cooler will continue to perform at its best for years to come.
| Prevention Tip | Działanie |
|---|---|
| Clean regularly | Clean the cooler to prevent dust buildup. |
| Reapply thermal paste | Replace thermal paste to maintain efficiency. |
| Monitor temperatures | Use software to ensure the CPU is not overheating. |
13. Can You Replace Your CPU Cooler While Installing New Components?
Replacing the CPU cooler is often part of a larger upgrade process. If you’re adding new components like a more powerful processor or a new motherboard, this is the perfect time to upgrade your cooler.
Why is this important? New components may generate more heat, so upgrading your cooler ensures that your system stays cool and stable.
| Upgrade Component | Działanie |
|---|---|
| CPU | Replace the cooler to handle increased heat. |
| Motherboard | Check if the cooler is compatible with the new motherboard. |
14. How Often Should You Remove and Clean Your CPU Cooler?
How often should you clean your CPU cooler? Well, it depends on several factors, including your usage and environment. If you’re using your computer for intense tasks like gaming or video editing, it’s important to clean your cooler more often.
General advice suggests cleaning your CPU cooler every 6-12 months, but if you notice performance issues like high temperatures, it might be time to clean it sooner.
| Cleaning Frequency | Działanie |
|---|---|
| Every 6-12 months | Clean cooler to ensure efficiency. |
| When temperature rises | Clean the cooler if system temperatures increase. |
15. What Happens If You Don’t Remove Your CPU Cooler?
Neglecting to remove and clean your CPU cooler can lead to serious issues. If dust and debris build up, your cooler may become less effective, which can lead to higher system temperatures. Overheating can cause instability, crashes, and even permanent damage to your CPU.
So, what’s the takeaway? Regular cooler maintenance is essential to ensure your computer continues running smoothly.
| Consequence | Działanie |
|---|---|
| Przegrzanie | Can lead to instability and crashes. |
| Reduced performance | Dust buildup reduces cooler efficiency. |
Wniosek
Removing your CPU cooler may seem daunting at first, but with the right preparation and knowledge, it’s a manageable task. By following the steps outlined in this article, you can safely remove, clean, and reinstall your CPU cooler to maintain optimal performance. Don’t forget to clean your cooler regularly and check for any issues to prevent overheating. Happy computing!

Sekcja FAQ
Pytanie 1: Czym jest chłodnica procesora?
A CPU cooler is a device used to dissipate heat from a computer’s central processing unit (CPU) to prevent overheating and ensure proper performance.
Pytanie 2: How does a CPU cooler work?
A CPU cooler works by drawing heat away from the CPU and dispersing it into the surrounding air or liquid. This helps maintain optimal temperatures for the CPU to function efficiently.
Pytanie 3: How can I remove a CPU cooler without damaging it?
To remove a CPU cooler safely, ensure the system is turned off and unplugged, use the proper tools, and carefully lift the cooler off the CPU, avoiding force or twisting that may damage the components.
Pytanie 4: When should I replace my CPU cooler?
You should replace your CPU cooler if it’s damaged, making unusual noises, or no longer providing adequate cooling. If your system starts to overheat or experience instability, a new cooler may be necessary.
Pytanie 5: Is it safe to reapply thermal paste on my CPU?
Yes, it’s safe to reapply thermal paste. In fact, it’s essential for maintaining good thermal conductivity between the CPU and cooler. Always clean off the old paste before applying a new layer.
