giriiş
Removing a CPU cooler can be an intimidating task, especially if it’s your first time. Whether you need to upgrade your cooling system or just clean out the dust, it’s essential to do it correctly to avoid damaging your hardware. This article will walk you through the process of safely removing your CPU cooler, step-by-step, and offer tips on what tools to use, how to clean your components, and what to do if things don’t go as planned.
1. Why Should You Remove Your CPU Cooler?
When it comes to PC maintenance, removing your CPU cooler might not be something you do frequently, but there are several reasons you might need to do it. Let’s dive into the main scenarios that call for removing your cooler.
But here’s the kicker – it’s not just about replacing the cooler for better performance. Sometimes, removing the CPU cooler is necessary for cleaning, maintenance, or even replacing the thermal paste that sits between the cooler and your processor. Over time, dust and debris can accumulate, reducing the cooler’s efficiency and leading to higher temperatures, which can negatively affect your system’s performance.
Another reason to remove the cooler is to check for any physical damage or wear. If your system has been running too hot, a cooler might have sustained damage or degraded. By taking the cooler off and inspecting it, you can ensure that it’s still working as it should. It’s also worth noting that removing the CPU cooler allows you to reset your thermal paste, which can improve thermal transfer and help keep your CPU cool.
Now, what happens if you don’t remove the cooler when necessary? Overheating could lead to throttling, system crashes, or even hardware damage. Trust me, avoiding this simple step can save you a lot of headaches down the line.
Table: Common Reasons to Remove Your CPU Cooler
| Reason | Tanım |
|---|---|
| Dust and debris buildup | Cleaning the cooler to maintain performance. |
| Physical damage or wear | Inspecting for damage or signs of degradation. |
| Thermal paste degradation | Reapplying fresh thermal paste for better heat transfer. |
2. What Tools Do You Need to Remove a CPU Cooler?
Before jumping into the removal process, it’s important to have the right tools on hand. Luckily, removing a CPU cooler doesn’t require specialized tools, but there are some essentials that make the job much easier.
What’s the real story? You don’t need a huge toolkit, but a few basic items can make a significant difference. The first thing you need is a screwdriver, preferably a Phillips head. Most coolers are attached with screws, so having a screwdriver handy is a must. You’ll also want a small, flat tool like a plastic pry tool to gently remove the cooler if it’s stuck.
If you’re working with a liquid cooler, you may also need a wrench or pliers to disconnect the hoses. This is especially true if the cooler uses hard tubing or requires disconnection of water lines. What’s more, make sure you have some paper towels or a clean cloth to wipe up any mess that might occur during the process, particularly when you remove thermal paste.
To make the job even smoother, you may want to use a thermal paste remover to clean the old paste off your CPU. This can make reapplying new thermal paste much easier and more effective.
Table: Essential Tools for CPU Cooler Removal
| Alet | Amaç |
|---|---|
| Phillips screwdriver | For removing screws that secure the cooler. |
| Plastic pry tool | Helps gently detach the cooler from the CPU without damage. |
| Wrench/pliers (if needed) | To disconnect hoses for liquid coolers. |
| Thermal paste remover | To clean old thermal paste from the CPU. |
3. How Do You Prepare Your PC for CPU Cooler Removal?
Now that you’ve got your tools ready, it’s time to prepare your PC. Proper preparation is critical to ensure the removal goes smoothly and without any mishaps.
Ready for the good part? First, always shut down your system and disconnect the power supply. If you’ve left your PC plugged in, there’s a chance that static electricity or even a power surge could cause damage to your sensitive components. Once the system is powered off, unplug all cables and peripherals to avoid any accidental snags during the process.
After that, you’ll need to open the case. Depending on the model of your PC, you may have screws securing the side panel, or it may simply pop off. It’s essential to create a safe and clutter-free workspace to work with the components, so make sure you have enough space to maneuver comfortably.
One often-overlooked step is wearing an anti-static wristband. This device prevents you from accidentally discharging static electricity onto your motherboard or CPU, which could cause irreparable damage. Once you’re set up, it’s time to carefully remove the CPU cooler. Remember, take your time during this process to avoid rushing.
Table: Preparation Checklist for Cooler Removal
| Adım | Aksiyon |
|---|---|
| Power off the system | Shut down your PC and disconnect from the power source. |
| Disconnect peripherals | Unplug all external devices to avoid tripping over cables. |
| Open the case | Remove the side panel to access internal components. |
| Wear an anti-static wristband | Prevent static electricity damage during handling. |
4. What Are the Common Types of CPU Coolers?
Before removing your CPU cooler, it’s important to understand the different types available. This will help you identify the specific removal steps for your cooler, as some require a bit more care than others.
What’s the real story here? CPU coolers come in three primary types: air coolers, liquid coolers, and AIO (All-in-One) coolers. Let’s break them down.
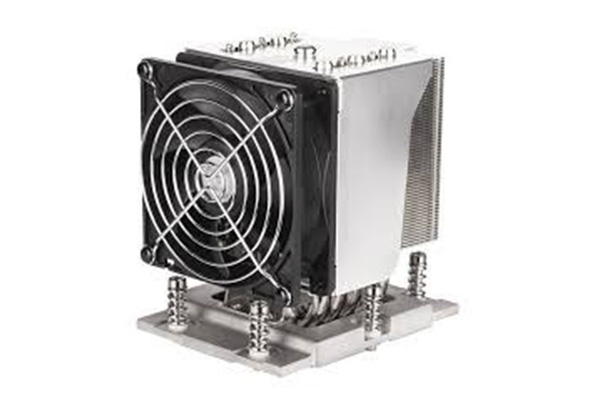
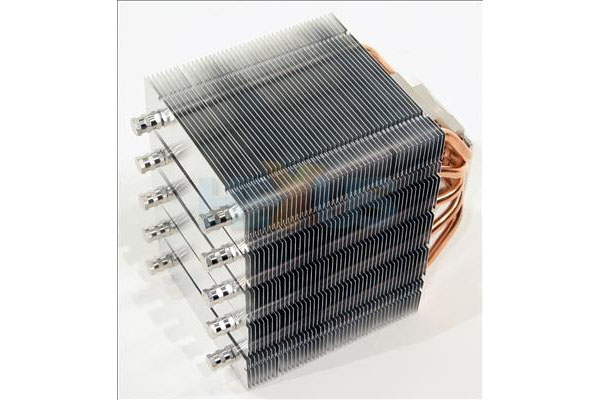
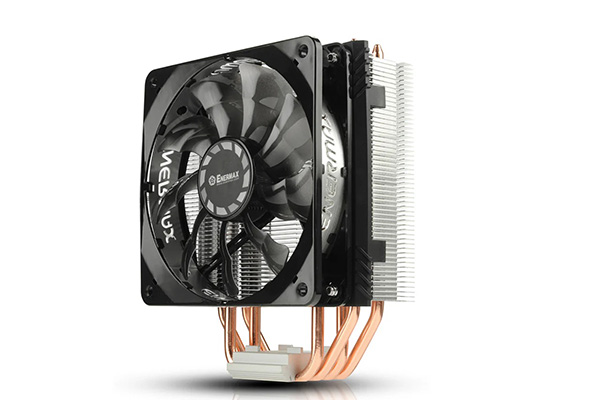
- Air coolers: These are the most common and consist of a heatsink and fan. Air coolers are typically easier to remove because they are secured with screws or clips. The fan is usually mounted on top of the heatsink and can be detached once the cooler is unscrewed from the CPU socket.
- Liquid coolers: These involve a pump, tubes, and a radiator. Removing these can be more complex because you’ll need to disconnect the tubes before pulling the cooler away from the CPU. Be careful not to damage the tubes or the pump during removal.
- AIO coolers: These are similar to liquid coolers but come pre-assembled and often don’t require manual installation of the pump or tubes. These can be tricky to remove, as you might need to drain the coolant if it’s a more complex system.
By knowing which cooler you have, you can determine the best way to proceed with the removal. Each type of cooler has its own nuances and requires different handling.
Table: Types of CPU Coolers
| Tip | Key Features |
|---|---|
| Air coolers | Heatsink and fan, easy to remove, budget-friendly. |
| Liquid coolers | Pump, tubing, radiator, can be complex to remove. |
| AIO coolers | Pre-assembled liquid coolers, efficient, often high-end. |
5. How Do You Remove an Air CPU Cooler?
Removing an air CPU cooler is often the simplest process. The key is to follow the steps carefully, so you don’t risk damaging any parts of your system.
Ready for the next step? To start, you’ll need to locate the screws or clips that are holding the cooler in place. These are typically located at the corners of the heatsink. Use your screwdriver to loosen the screws and gently lift the cooler off the CPU. Be sure to do this slowly to avoid damaging the thermal paste underneath.
Once you’ve removed the cooler, you may find that some thermal paste has stuck to the bottom of the cooler or the CPU. Use a clean cloth to wipe away any paste that remains. If the paste has dried, you can use a thermal paste remover to clean the surface. This will ensure that the new paste can form an effective bond when you reapply the cooler later.
The final step is to clean the surrounding area and make sure that there’s no dust buildup. Cleaning the fan blades, heatsink, and other components is essential for maintaining cooling efficiency. This simple step can go a long way in ensuring your system stays cool for the long term.
Table: Steps for Removing an Air CPU Cooler
| Adım | Aksiyon |
|---|---|
| Unscrew or unclip the cooler | Use a screwdriver to loosen the screws securing the cooler. |
| Remove the cooler gently | Lift the cooler off, being careful not to damage the CPU. |
| Clean up thermal paste | Wipe off any excess paste from the cooler and CPU. |
6. How Do You Remove a Liquid CPU Cooler?
Removing a liquid CPU cooler requires a bit more care due to the hoses and pump involved. But don’t worry, with a few extra precautions, you’ll be able to do it smoothly.
So, here’s what you need to know. The first step is to disconnect the power and coolant lines. Some systems will have quick-release connectors for easy detachment, while others may require you to use pliers or a wrench. Be sure to carefully disconnect each tube from the pump and radiator.
Once the tubes are free, you’ll need to unscrew the cooler from its mounting points. Take extra care when lifting the cooler off the CPU. Depending on your model, there may be additional screws that secure the cooler’s pump or block. Once these are removed, the cooler should lift off without any issues.
After removing the cooler, make sure to inspect the radiator and pump for any damage. You’ll also want to clean the cooler and surrounding components to prevent any leftover coolant or thermal paste from creating problems later.
Table: Steps for Removing a Liquid CPU Cooler
| Adım | Aksiyon |
|---|---|
| Disconnect power and coolant | Disconnect the pump and tubing, using a wrench or pliers. |
| Unscrew the cooler | Remove screws securing the cooler to the CPU. |
| Inspect the cooler and clean | Check for damage and clean off any leftover coolant or paste. |
7. What Are the Risks of Improper CPU Cooler Removal?
While removing a CPU cooler might seem straightforward, there are several risks involved if you don’t take the right precautions.
This is where it gets interesting – failing to follow the correct procedure can result in damage to your CPU or motherboard. The most common mistake is applying too much force when trying to remove the cooler, which can damage the pins on your CPU socket or crack the motherboard. Another issue that can arise is not cleaning the thermal paste properly, which can cause your new cooler to perform poorly.
Even worse, if you forget to disconnect the power supply or components beforehand, you risk shocking sensitive hardware or causing a short circuit. The worst-case scenario is the complete failure of your CPU or motherboard, both of which can be costly to replace.
To avoid these risks, make sure to follow every step carefully and take your time during the removal process. Also, always double-check your connections before starting the process.
Table: Risks of Improper Cooler Removal
| Risk | Consequence |
|---|---|
| Applying excessive force | Damages the CPU socket or motherboard. |
| Failing to clean thermal paste | Poor performance of the cooler and overheating. |
| Forgetting to disconnect power | Risk of electric shock or short-circuiting components. |
8. How Do You Clean Your CPU and Cooler After Removal?
After removing the cooler, cleaning the CPU and cooler is an essential step in ensuring efficient thermal management moving forward.
What’s the real story here? First, start with removing any leftover thermal paste. Apply a small amount of thermal paste remover or isopropyl alcohol to a lint-free cloth and gently wipe off the paste from the CPU surface. Be sure to do this carefully to avoid damaging the delicate processor pins.
Next, you’ll want to clean the cooler itself. The fan blades and heatsink are common places where dust can accumulate, so make sure to clean them thoroughly. Use compressed air to blow out any dust or debris from the cooler, fan, and surrounding areas. For liquid coolers, you may also want to drain any remaining coolant to ensure a fresh application of fluid when you reinstall the cooler.
Table: Cleaning Process for CPU and Cooler
| Adım | Aksiyon |
|---|---|
| Clean the CPU | Use alcohol or thermal paste remover to clean the CPU surface. |
| Clean the cooler | Blow out dust from the cooler and fan blades using compressed air. |
| Drain coolant (liquid coolers) | Ensure that the cooler is fully drained before reinstalling. |
9. What Should You Do If the Cooler Is Stuck?
Sometimes, the cooler might be stuck to the CPU, and removing it can feel like an impossible task.
But wait, there’s more! If the cooler is stuck, it’s often because the thermal paste has dried and hardened over time, bonding the cooler to the CPU. Don’t panic just yet! The first thing you should do is gently wiggle the cooler to see if it loosens up. If it doesn’t, use a plastic pry tool to carefully break the bond between the cooler and CPU.
If that doesn’t work, applying a small amount of heat using a hair dryer can soften the thermal paste, making it easier to remove the cooler. Just make sure to avoid overheating the CPU or motherboard.
Table: Solutions for a Stuck Cooler
| Çözüm | Aksiyon |
|---|---|
| Gently wiggle the cooler | Try loosening the cooler by carefully moving it. |
| Use a plastic pry tool | Insert a plastic tool to break the bond between the cooler and CPU. |
| Apply heat | Use a hair dryer on low heat to soften the thermal paste. |
10. How Do You Replace the Thermal Paste After Removal?
Once you’ve removed your cooler and cleaned everything, it’s time to reapply fresh thermal paste.
What’s the best approach? Start by applying a small pea-sized amount of thermal paste to the center of the CPU. It’s crucial not to overapply paste, as this can cause spillage when you reinstall the cooler.
Once applied, carefully reinstall the cooler by aligning it with the CPU socket and pressing it down firmly. The thermal paste should spread evenly across the surface, ensuring optimal thermal transfer.
Table: Thermal Paste Application Guide
| Adım | Aksiyon |
|---|---|
| Apply thermal paste | Use a pea-sized amount and place it in the center of the CPU. |
| Reinstall the cooler | Press down gently to spread the paste evenly. |
Çözüm
In conclusion, removing and replacing a CPU cooler is a necessary task for maintaining the health of your system. By understanding the process and using the right tools, you can ensure that your CPU remains cool and efficient for years to come. Always follow the correct steps, take your time, and remember to clean the components to keep your system running at peak performance.
11. How Do You Ensure Optimal Cooling After Installation?
Once your cooler is reinstalled, you’ll want to ensure it is functioning optimally. Proper cooling is essential to keep your CPU performing at its best. What should you be checking for after installation?
This is where it gets interesting—after reinstalling your cooler, it’s essential to monitor your system’s temperatures to ensure everything is running smoothly. Start by booting up your system and entering the BIOS or UEFI settings to check your CPU temperature. Ideally, it should be within a safe range, generally between 30°C and 50°C under idle conditions. If the temperature is higher, you may need to adjust the cooler’s positioning or verify that it’s securely attached.
You can also use software tools like HWMonitor or CoreTemp to track CPU temperatures while the system is in use. These tools allow you to see how the cooler is performing under load, especially when running intensive programs. It’s a good idea to test your system under a heavy workload, such as gaming or rendering, to see how the cooler handles the increased heat output.
Another key factor in ensuring optimal cooling is proper airflow inside your case. Make sure your fans are positioned for maximum efficiency, with intake fans bringing in fresh air and exhaust fans pushing hot air out. Proper airflow can greatly improve cooling performance and prevent overheating.
Finally, consider testing the cooler’s performance by stress testing the CPU. If the temperatures stay within the desired range during a stress test, then your cooler is working effectively.
Table: How to Monitor and Optimize Cooler Performance
| Yöntem | Aksiyon |
|---|---|
| Monitor temperatures in BIOS | Check the CPU temperature at idle and under load. |
| Use software tools | Tools like HWMonitor or CoreTemp to track real-time temperatures. |
| Test under stress | Run demanding applications to test cooler effectiveness. |
| Adjust airflow | Ensure proper airflow with intake and exhaust fans positioned correctly. |
12. How Do You Install a New CPU Cooler?
Installing a new CPU cooler is a critical step to ensuring your system maintains optimal temperatures. Whether you’re replacing an old cooler or upgrading to something more efficient, understanding the process can save you time and frustration. Ready to dive in?
Start by following similar steps as when removing the old cooler—shut down the system, disconnect power, and open the case. Once inside, remove the old cooler, taking note of any specific installation requirements for your new cooler. Most coolers come with specific mounting hardware, so make sure you have everything needed before starting the installation process.
Next, place the new cooler onto the CPU. For air coolers, line up the heatsink with the CPU socket and secure it with screws or clips. For liquid coolers, you may need to install a backplate to support the cooler’s pump. Follow the manufacturer’s instructions carefully for mounting the cooler to ensure it is installed correctly.
Once mounted, apply thermal paste to the center of the CPU. Use a small amount, as too much paste can create a mess and negatively impact thermal conductivity. After the paste is applied, gently press the cooler into place, making sure it sits evenly on the CPU.
Now, reconnect any power cables and coolant lines (for liquid coolers) and secure the fans. Ensure all cables are routed neatly to avoid obstructing airflow. Once everything is securely in place, close the case, reconnect your peripherals, and power on the system. Monitor the temperatures to ensure that the new cooler is functioning properly.
Table: Steps for Installing a New CPU Cooler
| Adım | Aksiyon |
|---|---|
| Remove the old cooler | Take out the old cooler carefully without damaging components. |
| Mount the new cooler | Attach the cooler using screws, clips, or a backplate. |
| Apply thermal paste | Place a small pea-sized amount in the center of the CPU. |
| Secure and reconnect components | Reattach power cables, coolant lines, and fans. |
13. How Do You Ensure Proper Airflow in Your PC Case?
Good airflow is crucial for maintaining stable temperatures in your system, particularly after installing a new cooler. But here’s the kicker – without proper airflow, even the best CPU cooler can struggle to keep your system cool.
So, what do you need to check to ensure airflow is on point? First, make sure your case has at least one intake fan at the front and one exhaust fan at the rear. The intake fans bring in fresh, cool air from outside the case, while the exhaust fans push the warm air out of the system. This creates a flow of air through the case, removing heat from the components.
You should also verify the placement of the cooler itself. If you have an air cooler, ensure that the fan is positioned to push air through the heatsink in the right direction. The airflow should align with the case’s fans to ensure efficient cooling. If you’re using a liquid cooler, position the radiator in a place where it can pull in cool air, typically at the top or front of the case.
Additionally, check that your case has enough space to allow air to circulate. High-density builds or cramped cases can restrict airflow, leading to higher temperatures. If necessary, consider adding more fans or choosing a case designed for better airflow.
Finally, regularly clean your fans and components to ensure they aren’t clogged with dust. Dust buildup can obstruct airflow and reduce the effectiveness of your cooling system.
Table: Key Factors for Optimizing PC Airflow
| Faktör | Aksiyon |
|---|---|
| Use intake and exhaust fans | Ensure there is one intake fan at the front and one exhaust at the rear. |
| Position the cooler correctly | Align the fan airflow with the case fans for better efficiency. |
| Ensure adequate space in the case | Make sure the case allows for airflow without obstruction. |
| Clean regularly | Remove dust from fans and components to maintain airflow. |
14. How Do You Manage Noise from Your CPU Cooler?
If you’ve noticed that your CPU cooler is too loud, it could be due to poor fan speed control, excessive dust buildup, or a malfunctioning cooler. Let’s address how to reduce noise and maintain a quiet system.
What’s the real story? Many CPU coolers come with adjustable fan speeds, which can be set through the BIOS or with software tools. Reducing the fan speed can significantly lower noise levels without compromising cooling performance, especially if you’re not running demanding applications. Make sure your cooler has a fan curve set up that adjusts speed based on temperature, so the fans are only loud when they need to be.
If you’re still hearing noise, check for dust buildup on the fans and heatsink. Dust can cause the fans to work harder, leading to more noise. Clean the fans and cooler regularly to keep everything running quietly.
Another tip is to choose a cooler that’s designed for quieter operation. Many manufacturers offer fans with lower noise profiles, which use special blades or anti-vibration pads to reduce noise. If noise is a significant concern, you might consider investing in a high-quality, low-noise cooler.
Lastly, ensure your PC case is optimized for noise reduction. Cases with soundproofing material or additional isolation for fans can help minimize noise levels significantly.
Table: Ways to Reduce Cooler Noise
| Yöntem | Aksiyon |
|---|---|
| Adjust fan speeds | Use BIOS or software to reduce fan speed under normal conditions. |
| Clean the cooler and fans | Remove dust from fans to reduce resistance and noise. |
| Choose a quieter cooler | Select coolers with low-noise profiles or noise-reducing technology. |
| Use a soundproof case | Consider cases with noise-dampening features. |

15. What Are the Best Practices for Long-Term Cooler Maintenance?
Once you’ve installed and optimized your CPU cooler, it’s important to maintain it properly to ensure long-term efficiency. Without proper care, even the best coolers can wear out, leading to performance degradation and potential overheating.
So, how do you make sure your cooler lasts as long as possible? First, clean it regularly. Dust buildup is one of the main culprits behind reduced cooling performance. Make sure to blow out dust from the fans and heatsink every few months, depending on your environment.
Also, consider reapplying thermal paste every year or so. Over time, thermal paste can dry out or degrade, reducing its effectiveness in transferring heat. Replacing the thermal paste ensures that your cooler maintains optimal performance.
Another tip is to monitor the performance of your cooler over time. Use temperature monitoring tools to keep an eye on your CPU’s temperature, especially when performing intensive tasks. If you notice temperatures creeping up or a significant drop in performance, it might be time to clean or replace the cooler.
Lastly, make sure your case continues to provide good airflow. Even if you’ve optimized airflow initially, changes in the case environment or added components can disrupt airflow. Regularly check that fans are working and that there are no obstructions.
Table: Best Practices for Cooler Maintenance
| Pratik | Aksiyon |
|---|---|
| Clean the cooler regularly | Blow out dust from fans and heatsink every few months. |
| Termal macunu tekrar uygulayın | Replace thermal paste every year or when performance drops. |
| Monitor cooler performance | Use software to monitor temperatures and ensure proper cooling. |
| Check airflow regularly | Ensure fans are working and there are no airflow blockages. |
Çözüm
In conclusion, removing and maintaining your CPU cooler is an essential task for ensuring optimal system performance. Whether you’re upgrading, cleaning, or troubleshooting, following the right procedures and using the correct tools will help you avoid potential issues. Remember, monitoring temperatures and airflow is just as important as the removal and installation process itself. By staying on top of maintenance, you can keep your CPU running smoothly and avoid costly hardware damage in the long run.
SSS
S1: CPU soğutucu nedir?
A CPU cooler is a device used to keep the processor cool by dissipating heat generated during its operation.
S2: How does a liquid CPU cooler work?
A liquid CPU cooler uses coolant circulated through tubes and a radiator to remove heat from the CPU.
S3: How do I remove my CPU cooler?
To remove your CPU cooler, you’ll need to unscrew it from the CPU, gently lift it off, and clean any thermal paste residue.
S4: How do I know if my CPU cooler needs to be replaced?
If your system is overheating or the cooler is making excessive noise, it might be time to replace it.
S5: Can I reuse my CPU cooler?
Yes, you can reuse your cooler as long as it’s still in good condition and the thermal paste is replaced.
