Giới thiệu
Installing an AMD CPU cooler might seem like a daunting task, but it’s an essential skill for anyone looking to maintain their system’s performance. Proper installation not only ensures your processor stays cool but also extends the lifespan of your components. In this article, we’ll walk you through the entire process, covering everything from selecting the right cooler to troubleshooting common issues. By the end, you’ll feel confident in your ability to install your own CPU cooler effectively.
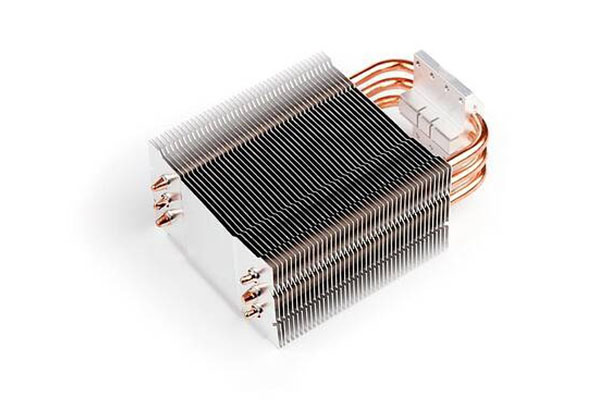
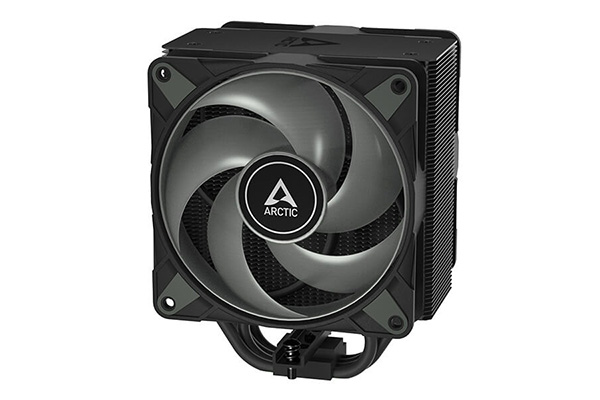
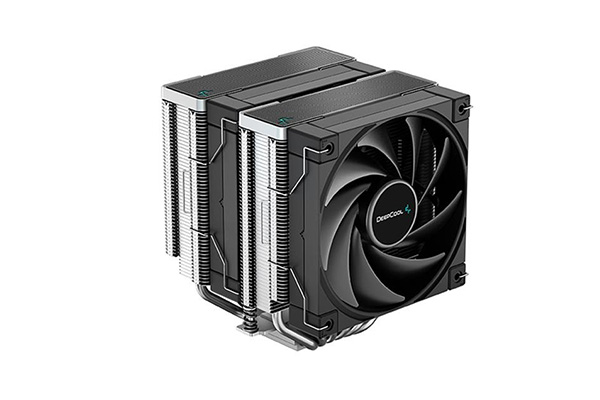
1. How to Choose the Right CPU Cooler for Your AMD Processor
Choosing the right CPU cooler is crucial for ensuring optimal performance and preventing overheating. There are several factors to consider when making your selection. First, you need to determine whether you want an air or liquid cooler. Air coolers are typically easier to install, cost-effective, and provide excellent cooling for most systems. Liquid coolers, on the other hand, are more efficient at heat dissipation and are a great choice for high-performance processors or systems that are overclocked.
What’s the real story here? Cooling efficiency, installation ease, and budget all come into play when making this decision. For example, AMD’s Ryzen processors are known for being power-hungry, so if you plan to overclock, you might want to opt for a liquid cooler to ensure your CPU stays cool under heavy loads. Air coolers can be just as effective for stock or slightly overclocked systems.
You also need to consider the size and compatibility of the cooler. Some large air coolers may not fit in smaller cases, so check your case’s specifications before purchasing. Additionally, some coolers are designed specifically for AMD sockets, while others may require an adapter.
Here’s the kicker: Choosing the right cooler doesn’t have to be complicated, but it’s important to factor in the specific requirements of your system to avoid compatibility issues.
Table: Comparison of Air Coolers vs. Liquid Coolers
| Tính năng | Máy làm mát không khí | Máy làm mát chất lỏng |
|---|---|---|
| Hiệu quả làm mát | Moderate to High | Cao |
| Installation Ease | Dễ | Moderate to Difficult |
| Trị giá | Budget-friendly | Đắt |
| Ideal Usage | Stock or light overclocking | High-performance and heavy overclocking |
| Space Requirement | Can be bulky | More compact, but requires space for radiator |
2. What Tools Are Needed to Install an AMD CPU Cooler?
Before you begin the installation process, it’s important to have the right tools at hand. The most basic tools you’ll need include a Phillips-head screwdriver and thermal paste. The screwdriver will help with securing the cooler to the motherboard, while thermal paste is essential for ensuring proper heat transfer between the CPU and cooler.
Ready for the good part? While the tools mentioned above are essential, having a few optional tools can make the process easier. For example, tweezers can help when handling small screws or thermal paste, and a cleaning brush can help remove any old paste from the CPU surface before applying a new layer. You’ll also need an anti-static wristband to prevent damage from static electricity, which can damage your sensitive components.
A magnetic tray can be helpful for keeping screws and small parts organized during the process. This ensures you won’t lose anything during the installation. Make sure to have your workspace prepared, with plenty of room and good lighting to work with.
Don’t forget to check that your cooler includes all the necessary mounting hardware for AMD processors, as some coolers may require separate adapters for different CPU socket types.
Table: Essential Tools for Installing a CPU Cooler
| Dụng cụ | Mục đích |
|---|---|
| Phillips-head screwdriver | Tighten screws and mount the cooler |
| Thermal paste | Ensure proper heat transfer between CPU and cooler |
| Anti-static wristband | Prevent static damage to components |
| Tweezers | Handle small screws or parts |
| Cleaning brush | Clean old thermal paste off CPU |
| Magnetic tray | Keep screws organized |
3. How Do You Prepare Your System for CPU Cooler Installation?
Proper preparation is key to ensuring a smooth installation process. Before you start, turn off your computer and unplug it from the power source. Disconnect any peripherals, such as your keyboard, mouse, and monitor, to prevent interference during the installation.
What’s the real story here? Grounding yourself is critical! This is where you need to focus on avoiding static buildup. Static electricity can cause irreparable damage to your components, so always use an anti-static wristband when working inside your PC. If you don’t have one, regularly touch a grounded metal object to discharge any static buildup.
Now, let’s look at the workspace. Ensure that you’re working on a non-static surface, such as a wooden table, and avoid wearing any clothing that could generate static. It’s also a good idea to keep your system case open to provide enough room to work in.
This is where it gets interesting: Preparation doesn’t just stop at the physical space. Take a few minutes to review your CPU cooler’s manual to ensure you’re familiar with the installation process before diving in. Being familiar with the instructions will save you time and prevent mistakes.
Table: Pre-Installation Checklist
| Nhiệm vụ | Status |
|---|---|
| Turn off the system and unplug it | ✔️ |
| Disconnect peripherals | ✔️ |
| Ground yourself | ✔️ |
| Clean workspace and remove static | ✔️ |
| Review installation manual | ✔️ |
4. How Do You Remove Your Old AMD CPU Cooler?
If you’re upgrading your CPU cooler or replacing a malfunctioning one, you’ll need to remove the old cooler first. This process can vary depending on the type of cooler you have. For air coolers, you’ll typically need to remove the screws that secure the cooler to the CPU socket.
But here’s the kicker: Liquid coolers often have additional steps since they require removing the radiator and disconnecting the tubing. Always ensure that you’re gentle during this process to avoid damaging other components.
After removing the cooler, it’s important to clean off any remaining thermal paste from the CPU and cooler surface. You can use isopropyl alcohol and a microfiber cloth for this. Make sure that no residue is left behind before applying the new thermal paste.
You also need to inspect the CPU socket for any damage. While this is a rare occurrence, it’s good practice to check for bent pins or debris that may interfere with the new cooler’s installation.
Table: Steps for Removing Your Old AMD CPU Cooler
| Bước chân | Hoạt động |
|---|---|
| Step 1: Unscrew the cooler | Remove screws securing the cooler |
| Step 2: Disconnect the cooler | For liquid coolers, disconnect the radiator |
| Step 3: Clean off old thermal paste | Use isopropyl alcohol and a microfiber cloth |
| Step 4: Inspect the CPU socket | Look for damage or debris |
5. What Are the Safety Precautions for Installing a CPU Cooler?
When it comes to installing a CPU cooler, safety should be your top priority. First, make sure that your power supply is completely turned off and unplugged before starting any work. This prevents any accidental shocks or damage to your components.
What’s the real story? Always handle components with care. When working with your CPU, make sure you don’t apply excessive force, as this could damage the delicate pins or circuitry. Also, avoid touching the CPU’s contacts or the underside of the cooler.
Another important safety consideration is working in a well-lit environment. Poor lighting can lead to mistakes, so make sure you have adequate lighting to work with. Additionally, keep your workspace clean and free from clutter to reduce the risk of losing small screws or parts during installation.
By following these precautions, you can ensure that your CPU cooler installation goes smoothly without causing any harm to your components.
Table: Safety Precautions for Installing a CPU Cooler
| Precaution | Hoạt động |
|---|---|
| Power off and unplug system | Prevent electrical hazards |
| Handle components with care | Avoid damage to sensitive parts |
| Work in a well-lit environment | Minimize mistakes and errors |
| Keep workspace clean and organized | Prevent losing small parts |
6. How Do You Apply Thermal Paste on Your AMD CPU?
Applying thermal paste is a critical step in the cooler installation process. It ensures efficient heat transfer between the CPU and the cooler. You might be wondering, how much thermal paste should you apply? Here’s the deal: you want to apply just the right amount—too little won’t provide enough coverage, and too much can overflow and make a mess.
First, take a small pea-sized amount of thermal paste and place it in the center of the CPU’s surface. Don’t spread it around with a tool; when you press the cooler onto the CPU, the paste will spread evenly. You might think that spreading the paste is a good idea, but trust me—this can result in uneven distribution.
Once the thermal paste is applied, carefully place the cooler onto the CPU, making sure it aligns correctly with the mounting brackets. Apply a bit of pressure to ensure a solid contact. If you’re using an air cooler, secure it by tightening the screws in a cross pattern to evenly distribute the pressure.
What’s the real story here? It’s tempting to overdo it, but over-applying thermal paste can cause it to spill over and potentially cause short circuits. Use a small amount and let the cooler do the spreading.
Table: Thermal Paste Application Guide
| Amount to Apply | Hoạt động |
|---|---|
| Small pea-sized amount | Apply in the center of the CPU |
| Too much | Can cause overflow and mess |
| Too little | Insufficient coverage for effective cooling |
7. How Do You Install an Air Cooler for AMD Processors?
Installing an air cooler is often the simpler option, but it still requires attention to detail. First, ensure that the mounting brackets are properly attached to the cooler. Most air coolers come with a backplate and mounting screws specifically designed for AMD processors, but it’s essential to check that the components are compatible with your system.
Ready for the good part? Align the cooler with the mounting holes on your CPU socket. Once you’ve made sure everything lines up, gently lower the cooler onto the CPU, ensuring that the thermal paste makes good contact. Now, it’s time to secure the cooler with the screws, tightening them in a criss-cross pattern to evenly distribute pressure.
You should also check the cooler’s fan orientation. The fan should be positioned in such a way that it maximizes airflow across the CPU and out of the case. A common mistake is positioning the fan in the wrong direction, which could lead to inefficient cooling and increased temperatures.
Once everything is in place, double-check that the cooler is firmly attached and that there are no gaps between the cooler base and the CPU surface. Don’t forget to connect the fan’s power cable to the motherboard, and you’re done!
Table: Steps for Installing an Air Cooler
| Bước chân | Hoạt động |
|---|---|
| Step 1: Attach the mounting brackets | Secure the backplate and mounting screws |
| Step 2: Align cooler with CPU | Lower the cooler onto the CPU socket |
| Step 3: Tighten screws | Use a criss-cross pattern for even pressure |
| Step 4: Check fan orientation | Ensure optimal airflow for cooling |
| Step 5: Connect fan to motherboard | Power up the fan for proper cooling |
8. How Do You Install a Liquid Cooler for AMD Processors?
Liquid coolers are more complex than air coolers but provide superior cooling, especially for high-performance systems. When installing a liquid cooler, you’ll need to begin by securing the radiator. First, locate a suitable spot for the radiator within your case. Ideally, you want to place the radiator at the top or front of the case, where airflow is optimized.
Here’s the kicker: Once the radiator is positioned, it’s time to connect the tubing to the cooler’s water block. The water block, which is responsible for transferring heat from the CPU to the liquid coolant, needs to be placed precisely on the processor. Apply thermal paste to the CPU before mounting the water block, just like you would for an air cooler.
The next step is to secure the water block onto the CPU socket. Use the provided mounting hardware to attach it securely. Be sure to tighten the screws in a criss-cross pattern to avoid uneven pressure. After the water block is in place, attach the cooling fans to the radiator. Make sure the fan is oriented in a way that will push air through the radiator and out of the case.
Once all components are mounted, you can connect the radiator and fans to your motherboard and power supply, ensuring that they’re powered up and ready to function properly.
Table: Steps for Installing a Liquid Cooler
| Bước chân | Hoạt động |
|---|---|
| Step 1: Position the radiator | Secure the radiator in a suitable case location |
| Step 2: Apply thermal paste | Apply paste to the CPU before mounting the water block |
| Step 3: Secure the water block | Use mounting hardware for a secure fit |
| Step 4: Attach cooling fans | Position fans for optimal airflow |
| Step 5: Connect to motherboard | Connect the radiator and fans to the motherboard |
9. What Are the Common Mistakes When Installing a CPU Cooler?
Mistakes happen, but they can be costly, especially when installing a CPU cooler. One of the most common mistakes is not applying enough thermal paste. Too little paste can cause poor heat transfer, leading to higher temperatures and potential system instability. On the other hand, using too much thermal paste can cause it to overflow and create a mess, which could damage your components.
Another mistake is improperly aligning the cooler with the CPU socket. If the cooler isn’t aligned correctly, you could end up with uneven pressure, which can lead to poor cooling performance. Always double-check the alignment before securing the cooler.
You might be wondering, what’s the real impact of fan orientation? Incorrect fan positioning can drastically reduce cooling efficiency. It’s essential to ensure that the cooler fan is pushing air through the heatsink and out of the case.
Lastly, some users forget to connect the fan’s power cable to the motherboard, which will prevent the fan from spinning and delivering adequate cooling.
Table: Common CPU Cooler Installation Mistakes
| Sai lầm | Consequence |
|---|---|
| Too little thermal paste | Poor heat transfer, higher temperatures |
| Too much thermal paste | Messy application, potential damage |
| Incorrect cooler alignment | Uneven pressure, poor cooling performance |
| Incorrect fan orientation | Reduced cooling efficiency |
| Forgetting to connect the fan | No airflow, inadequate cooling |
10. How Can You Ensure Your AMD CPU Cooler is Installed Correctly?
Ensuring that your CPU cooler is installed correctly is crucial for your system’s performance. First, verify that the cooler is securely mounted to the CPU socket. The cooler should sit flat against the CPU surface, with no gaps in between. You should be able to apply a bit of pressure without feeling any movement.
But here’s the kicker: Once the cooler is in place, you should monitor the CPU temperature to ensure that the cooler is doing its job. If your temperatures are higher than expected, you might want to remove the cooler and check that it’s seated correctly. Sometimes, a small shift during installation can cause issues.
Another way to ensure proper installation is to use software tools to monitor the system’s cooling performance. Stress test your CPU to see how well the cooler maintains stable temperatures under load. If the temperatures rise too quickly, your cooler might not be making full contact with the CPU.
Table: How to Verify Cooler Installation
| Bước chân | Hoạt động |
|---|---|
| Step 1: Check cooler mounting | Ensure the cooler is firmly attached to the CPU socket |
| Step 2: Monitor CPU temperatures | Use monitoring software to check temps |
| Step 3: Perform stress tests | Verify cooling performance under load |
| Step 4: Re-seat cooler if necessary | Adjust if temperatures are too high |

11. How Do You Test the CPU Cooler After Installation?
Testing your CPU cooler after installation is an essential step to ensure it’s performing as expected. The first thing you’ll want to do is monitor your CPU temperature during regular use. You can use software like HWMonitor or Core Temp to check real-time temperatures.
What’s the real story? You’ll need to stress test your system to ensure that the cooler can handle heavy workloads without pushing the CPU temperature too high. Running a program like Prime95 or AIDA64 will put a load on your CPU, and you can monitor the temperature during the test.
If your temperatures remain stable under stress testing, that’s a good sign your cooler is working as it should. However, if you notice the temperature rising beyond safe levels, it’s time to inspect the installation and make sure everything is set up correctly.
Table: Testing Your CPU Cooler Performance
| Test | Hoạt động |
|---|---|
| Monitor temperatures during use | Use software to check real-time CPU temperature |
| Stress test the CPU | Use Prime95 or AIDA64 for load testing |
| Analyze temperature stability | Ensure temps remain within safe limits |
12. How Do You Maintain Your AMD CPU Cooler?
Maintaining your CPU cooler is essential for ensuring long-term performance. Over time, dust and debris can accumulate on the cooler’s fan and heatsink, reducing airflow and cooling efficiency. To maintain optimal performance, you should regularly clean your cooler, ideally every 6 to 12 months.
What’s the real story here? Cleaning the cooler is simple. Use a can of compressed air to blow dust out of the fan and heatsink. Be sure to hold the fan blades in place to prevent them from spinning too quickly and causing damage. If you’re using a liquid cooler, check the radiator and ensure that there is no dust clogging the fins.
You also need to check the thermal paste every couple of years. Over time, thermal paste can dry out and lose its effectiveness. Reapplying thermal paste can help restore your cooler’s performance.
Table: Maintaining Your CPU Cooler
| Maintenance Task | Tính thường xuyên |
|---|---|
| Clean the cooler with compressed air | Every 6 to 12 months |
| Check thermal paste | Every 2 years |
| Inspect fans for dust | Monthly or as needed |
13. How Does Proper CPU Cooler Installation Improve System Performance?
Proper installation of a CPU cooler directly impacts your system’s stability and performance. When your CPU runs too hot, it can throttle its performance to prevent overheating, leading to slower speeds and potential crashes. By ensuring your CPU cooler is installed correctly and operating efficiently, you keep your system running at peak performance.
But here’s the kicker: A cooler that works well can also extend the life of your components. Overheating is one of the leading causes of hardware failure, so keeping your CPU at optimal temperatures helps protect your entire system.
Table: Impact of Proper CPU Cooling
| Lợi ích | Kết quả |
|---|---|
| Maintains optimal CPU temperature | Prevents overheating and system instability |
| Enhances performance | Prevents throttling, allows full CPU performance |
| Extends system lifespan | Reduces risk of hardware failure due to heat |
14. How Do You Troubleshoot Common CPU Cooler Issues?
Sometimes things don’t go as planned, and your CPU cooler might not perform as expected. One of the most common issues is high CPU temperatures. If you notice your temperatures are rising too quickly, the first step is to check if the cooler is properly installed.
What’s the real story? If everything looks fine, try cleaning the cooler and reapplying thermal paste. Dust buildup or old thermal paste can reduce the cooler’s efficiency. If your cooler is old or the fan is malfunctioning, it might be time to replace it.
Other issues to watch out for include noisy fans or improper airflow. If the fan is making strange noises, it could be a sign of a problem with the bearings or motor. In that case, replacing the fan might be necessary.
Table: Troubleshooting CPU Cooler Issues
| Vấn đề | Giải pháp |
|---|---|
| High CPU temperatures | Recheck installation and reapply thermal paste |
| Noisy fan | Check for fan damage or replace the fan |
| Poor airflow | Clean the cooler and ensure proper fan orientation |
15. What Should You Do if Your AMD CPU Cooler Isn’t Performing Well?
If your CPU cooler isn’t performing well, it’s important to diagnose the issue early. If temperatures are too high, ensure that the cooler is seated properly and that there’s enough thermal paste. If the cooler is old, consider upgrading to a newer model.
The key here? Make sure the cooler is functioning correctly, and if necessary, replace faulty components. A well-functioning CPU cooler is vital for ensuring the longevity of your AMD processor.
Table: Steps to Take if CPU Cooler Isn’t Performing Well
| Bước chân | Hoạt động |
|---|---|
| Step 1: Check cooler installation | Ensure the cooler is seated properly and aligned |
| Step 2: Inspect thermal paste | Reapply paste if necessary |
| Step 3: Replace the cooler | Consider upgrading if cooler is faulty |
Câu hỏi thường gặp
Câu hỏi 1: What is an AMD CPU cooler?
An AMD CPU cooler is a device designed to dissipate heat generated by the CPU, ensuring that the processor remains at an optimal temperature for stable operation.
Câu hỏi 2: How does thermal paste work?
Thermal paste helps transfer heat from the CPU to the cooler more efficiently by filling in microscopic gaps between the CPU surface and cooler base.
Câu hỏi 3: How do I know if my CPU cooler is working properly?
You can check your cooler’s performance by monitoring the CPU temperature using software, ensuring it stays within safe limits during regular usage or under load.
Câu hỏi 4: Can I install a CPU cooler without thermal paste?
No, thermal paste is crucial for ensuring effective heat transfer between the CPU and cooler. Installing a cooler without thermal paste can result in higher temperatures and potential damage.
Câu hỏi 5: How often should I clean my AMD CPU cooler?
It’s recommended to clean your CPU cooler every 6 to 12 months, depending on your system’s dust buildup, to maintain optimal airflow and cooling efficiency.
