Giới thiệu
Removing a CPU cooler might seem like a daunting task for those who are not familiar with the internal workings of a computer. However, with the right guidance, the process is manageable and can even be done with ease. In this article, we will walk you through the entire process of removing a CPU cooler, explaining each step in detail. Whether you need to replace the cooler, reapply thermal paste, or simply clean your PC, this guide has you covered. So, let’s dive in!
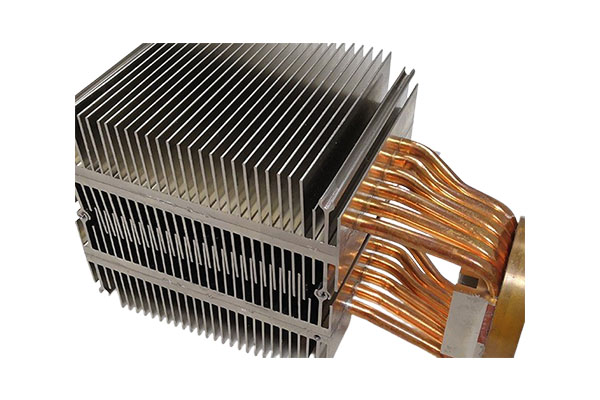
1. Why Do You Need to Remove the CPU Cooler?
Removing the CPU cooler is often necessary when performing maintenance on your system or upgrading parts. But why is it so important? The CPU cooler plays a crucial role in keeping the processor at an optimal temperature. If you’re experiencing overheating issues or want to clean your PC, removing the cooler is often the first step.
Nhưng đây mới là điều đáng chú ý… Sometimes, removing the cooler is also part of a larger upgrade, like switching out thermal paste or upgrading to a more powerful cooler. These actions can significantly improve your PC’s overall performance.
For example, consider when you replace thermal paste, which helps maintain the heat transfer between the cooler and the CPU. Over time, thermal paste can degrade, reducing the efficiency of heat transfer. When this happens, you need to remove the cooler, clean the CPU, and apply new paste.
Moreover, dust buildup in the cooler over time can affect the cooling efficiency, leading to higher CPU temperatures. Câu chuyện thực sự là gì? If you’re planning on performing any internal maintenance, removing the cooler is often the first step.
Table 1: Common Reasons for Removing a CPU Cooler
| Reason | Sự miêu tả |
|---|---|
| Replacing thermal paste | Ensures better heat transfer and cooling |
| Cleaning the cooler and CPU | Removes dust buildup, improving cooling efficiency |
| Upgrading to a new cooler | For better cooling performance |
2. What Tools Do You Need to Remove the CPU Cooler?
Before you get started, it’s essential to gather the right tools. Bạn đã sẵn sàng cho phần thú vị chưa? The tools you need are simple, and you probably already have most of them in your toolbox.
- Screwdrivers: You’ll need a Phillips-head screwdriver to remove screws that secure the cooler in place.
- Pry tool or plastic spatula: A plastic pry tool is useful if the cooler is stuck and needs a gentle nudge to come off.
- Thermal paste: You will need fresh thermal paste when reinstalling the cooler to ensure proper heat transfer.
- Cleaning materials: A microfiber cloth, rubbing alcohol, and cotton swabs will help clean the CPU and cooler.
Nhưng đây mới là điều đáng chú ý… While you might think you need fancy equipment, most coolers are designed to be easily removed with basic tools. The key is having patience and not rushing through the process.
Table 2: Essential Tools for Removing a CPU Cooler
| Dụng cụ | Mục đích |
|---|---|
| Phillips-head screwdriver | To remove screws securing the cooler |
| Plastic pry tool | To gently lift the cooler off the CPU |
| Thermal paste | For reapplying after the cooler is removed |
| Cleaning materials | To clean the CPU and cooler |
3. How to Prepare Your Computer for Cooler Removal?
Before you begin the cooler removal process, preparing your computer is essential for safety and efficiency. Đây chính là lúc mọi chuyện trở nên thú vị… Taking the proper precautions ensures you don’t damage sensitive components or put yourself at risk of electric shock.
First, power off your computer and unplug all cables. Make sure to disconnect everything—especially the power supply—so you don’t risk any electrical mishaps. Afterward, you’ll want to ensure that you have a clean workspace. This is important because you don’t want dust or debris to enter the internal components of your system while you work.
Also, ensure that you have static protection. But wait, there’s more… Static electricity can destroy the delicate components inside your PC. Use an anti-static wristband to safely discharge any static buildup in your body.
Table 3: Key Preparations for CPU Cooler Removal
| Preparation | Sự miêu tả |
|---|---|
| Power off and unplug cables | Prevents electrical mishaps |
| Clean workspace | Reduces the risk of dust or debris entering the PC |
| Use static protection (wristband) | Prevents static discharge from damaging components |
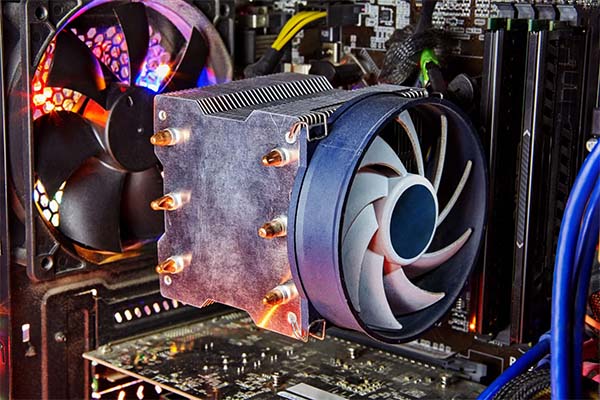
4. How to Remove the CPU Cooler from Your Computer?
Once your system is powered down and prepared, it’s time to remove the cooler. Câu chuyện thực sự là gì? This step is all about patience and a gentle touch.
- Step 1: Start by unscrewing the cooler. Many CPU coolers are secured by screws that hold them in place. Use the Phillips-head screwdriver to loosen and remove these screws.
- Step 2: Next, carefully detach any cables connected to the cooler. These might include fan power cables or sensor connectors.
- Step 3: Once the cooler is loose, gently pull it off the CPU. If it’s stuck, do not yank it forcefully. Instead, use a plastic pry tool to gently loosen the bond between the cooler and the CPU.
Bạn đã sẵn sàng cho phần thú vị chưa? When you’re removing the cooler, don’t rush it! Take your time to avoid damaging the CPU or motherboard.
Table 4: Step-by-Step CPU Cooler Removal Process
| Bước chân | Hoạt động |
|---|---|
| Step 1 | Unscrew the cooler from the CPU |
| Step 2 | Detach cables connected to the cooler |
| Step 3 | Gently lift the cooler off the CPU |
5. What to Do if the Cooler is Stuck?
Occasionally, your cooler might be a little stuck due to dried thermal paste or other factors. Đây chính là lúc mọi chuyện trở nên thú vị… It’s essential not to panic, and definitely don’t force the cooler off.
The first thing to do is try to gently twist the cooler. Sometimes, a bit of twisting can loosen the bond between the cooler and the CPU. Nhưng đây mới là điều đáng chú ý… If twisting doesn’t work, use a plastic pry tool to gently lift the cooler. This is a safer option than using metal tools, which can scratch or damage the components.
If you notice that the thermal paste has bonded too strongly, you may need to warm the cooler slightly by turning on your PC for a few seconds. The heat will soften the paste, making the cooler easier to remove.
Table 5: Troubleshooting a Stuck CPU Cooler
| Vấn đề | Giải pháp |
|---|---|
| Cooler is stuck due to thermal paste | Twist gently, or use a plastic pry tool |
| Cooler doesn’t budge at all | Apply slight heat to soften the thermal paste |
Phần kết luận
In this guide, we’ve walked you through the process of safely removing a CPU cooler. From gathering the right tools to dealing with stuck coolers, we’ve covered everything you need to know. Bạn đã sẵn sàng cho phần thú vị chưa? After following these steps, you’ll be well-equipped to handle cooler removal with ease. Don’t forget to reapply thermal paste and clean the components for optimal performance!
By following this guide, you can ensure your system remains cool and performs at its best. Whether you’re upgrading or maintaining your PC, this simple process is an essential skill for anyone working with computer hardware.
6. How to Clean the CPU and Cooler?
Cleaning the CPU and cooler is an essential part of maintaining your computer’s performance. But wait, there’s more… Cleaning removes dust and grime that can build up over time and reduce your system’s cooling efficiency.
Start by using a microfiber cloth to gently wipe off any dust from the CPU and cooler. Đây chính là điều thú vị… A can of compressed air can be very useful for clearing out dust from tight spots. Be sure to hold the can upright and use short bursts to prevent moisture from escaping. You can also use a cotton swab with rubbing alcohol to clean the surface of the CPU, removing any old thermal paste that may have spread beyond its intended area.
Don’t forget to clean the cooler’s fins and fan blades. Over time, dust can accumulate, preventing proper airflow. To clean these parts, use compressed air to blow the dust out, being cautious not to damage any delicate components.
Câu chuyện thực sự là gì? Regular cleaning helps improve the lifespan of your components and ensures that your PC continues to run cool and quiet, without thermal throttling.
Table 6: Cleaning Materials for CPU and Cooler
| Cleaning Item | Mục đích |
|---|---|
| Microfiber cloth | Removes surface dust from CPU and cooler |
| Không khí nén | Clears out dust from tight spots and components |
| Rubbing alcohol | Cleans off thermal paste and grime |
| Cotton swabs | Helps clean corners and delicate areas |
7. How to Apply Thermal Paste After Removing the Cooler?
Applying thermal paste is a critical step after removing the CPU cooler. Đây chính là điều thú vị… Without proper application of thermal paste, your cooler won’t function at its best, and your CPU could overheat.
To apply thermal paste, start with a small, pea-sized amount in the center of the CPU. Nhưng đây mới là điều đáng chú ý… Don’t overdo it. Too much paste can cause it to spill over the edges, reducing its effectiveness. When you reinstall the cooler, it will spread the paste evenly across the CPU.
Use a quality thermal paste to ensure the best performance. High-quality pastes, such as those with ceramic or metal-based compounds, provide superior heat transfer. Câu chuyện thực sự là gì? If you use the right amount of high-quality thermal paste, your CPU cooler will perform optimally, maintaining proper temperatures during heavy workloads.
Make sure the CPU surface is clean before applying the paste, and always clean the cooler’s contact area with alcohol to remove old paste.
Table 7: Thermal Paste Application Guide
| Bước chân | Hoạt động |
|---|---|
| Step 1 | Place a small, pea-sized amount of paste in the center |
| Step 2 | Reinstall the cooler and let it spread the paste evenly |
| Step 3 | Clean the CPU surface before applying new paste |
8. How to Check for Potential Damage After Cooler Removal?
After you’ve removed the cooler, it’s essential to check for any potential damage to the CPU or motherboard. Bạn đã sẵn sàng cho phần thú vị chưa? If the cooler has been removed too forcefully or if the thermal paste has bonded too tightly, you may encounter issues.
Start by carefully inspecting the CPU. Look for bent pins or any visible cracks. Câu chuyện thực sự là gì? If you notice any damage, it’s critical to replace the CPU immediately, as continuing to use a damaged CPU can lead to permanent issues.
Also, check the motherboard’s CPU socket for any signs of damage. Sometimes, forceful cooler removal can damage the socket’s pins. If everything looks good, proceed to reinstall the cooler.
Nhưng đây mới là điều đáng chú ý… The key to avoiding damage during cooler removal is taking your time. A calm, methodical approach ensures that your CPU and motherboard stay in perfect condition.
Table 8: Common Issues and How to Identify Them
| Vấn đề | Cần tìm gì | Giải pháp |
|---|---|---|
| Bent pins on CPU | Visible misalignment of pins | Replace the CPU |
| Cracked CPU | Small cracks or chips on the CPU surface | Replace the CPU |
| Damaged motherboard socket | Missing or bent pins in the CPU socket | Repair or replace the motherboard |
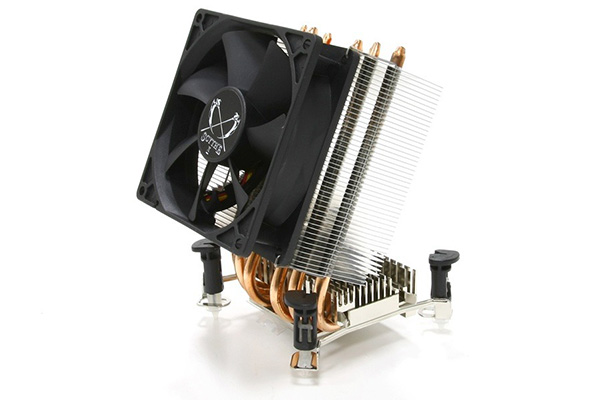
9. How to Safely Reinstall the CPU Cooler?
Reinstalling the CPU cooler is a crucial step to ensure your system functions properly. Nhưng đây mới là điều đáng chú ý… Proper installation will ensure that the thermal paste spreads evenly, and the cooler is securely fastened to the CPU.
Start by aligning the cooler with the CPU socket. Carefully place it back on top, ensuring that it is positioned evenly. Câu chuyện thực sự là gì? The cooler should sit flat against the CPU, with no tilt or gaps between the cooler base and the CPU.
Once aligned, tighten the screws in a criss-cross pattern to ensure an even distribution of pressure. Bạn đã sẵn sàng cho phần thú vị chưa? Don’t overtighten the screws, as this can cause damage to the cooler or motherboard.
After the cooler is installed, plug in the fan cables and double-check that everything is secure before powering up the system.
Table 9: CPU Cooler Reinstallation Steps
| Bước chân | Hoạt động |
|---|---|
| Step 1 | Align the cooler with the CPU socket |
| Step 2 | Tighten screws evenly in a criss-cross pattern |
| Step 3 | Plug in the fan cables and check for security |
10. What Are the Risks of Removing the CPU Cooler Incorrectly?
Removing the CPU cooler incorrectly can cause significant damage to your components. But wait, there’s more… The most common risk is damaging the CPU or motherboard during the process. A forceful removal can cause bent pins, cracked chips, or damage to the motherboard’s socket.
Another risk is damaging the cooler itself. Câu chuyện thực sự là gì? If the cooler is stuck, forcing it off can break fan blades or dislodge internal components, leading to expensive repairs or replacements.
To avoid these risks, always use gentle force and the correct tools when removing the cooler. Đây chính là điều thú vị… Proper preparation and a steady hand will reduce the chances of causing damage.
Table 10: Risks and Solutions When Removing the CPU Cooler
| Rủi ro | Consequences | Giải pháp |
|---|---|---|
| Damaging the CPU | Bent pins or cracks that could render the CPU useless | Use gentle force, inspect the CPU thoroughly |
| Breaking the cooler | Fan blades or internal parts may break or malfunction | Use the right tools and avoid forceful removal |
11. How to Troubleshoot If Your Computer Overheats After Reinstalling the Cooler?
Overheating can occur if the cooler wasn’t reinstalled correctly or if the thermal paste wasn’t applied properly. Câu chuyện thực sự là gì? If your computer is overheating, you’ll need to troubleshoot the installation process.
First, check that the cooler is seated properly. If it’s loose, it won’t be able to cool the CPU effectively. Bạn đã sẵn sàng cho phần thú vị chưa? If the cooler is secure, check the thermal paste. If too much or too little was applied, the cooler won’t make proper contact with the CPU.
Finally, ensure that the cooler’s fan is working correctly. Sometimes, a malfunctioning fan can prevent proper heat dissipation.
Table 11: Troubleshooting Overheating After Cooler Reinstallation
| Vấn đề | What to Check | Giải pháp |
|---|---|---|
| Cooler is loose | Check if the cooler is seated properly | Tighten screws and secure the cooler |
| Thermal paste issue | Check if too much or too little paste was applied | Reapply thermal paste with the right amount |
| Fan malfunction | Check if the fan is running correctly | Replace or fix the fan if necessary |
12. How Often Should You Remove and Clean the CPU Cooler?
Regular maintenance is key to keeping your CPU cooler running efficiently. Nhưng đây mới là điều đáng chú ý… Cleaning the cooler too often is unnecessary, but neglecting it for too long can cause performance issues.
Most experts recommend cleaning your CPU cooler every 6 months. Câu chuyện thực sự là gì? Dust buildup can block airflow and prevent the cooler from doing its job, leading to overheating. Cleaning it every 6 months helps avoid these issues and keeps your computer running smoothly.
For users in dust-prone areas, more frequent cleaning may be necessary. Bạn đã sẵn sàng cho phần thú vị chưa? Even a quick dusting with compressed air can make a significant difference in cooling performance.
Table 12: Recommended Cleaning Frequency
| Cleaning Interval | Recommended Action |
|---|---|
| Mỗi 6 tháng | Clean the cooler and apply new thermal paste |
| Every 3 months (dusty areas) | Perform a quick dusting using compressed air |
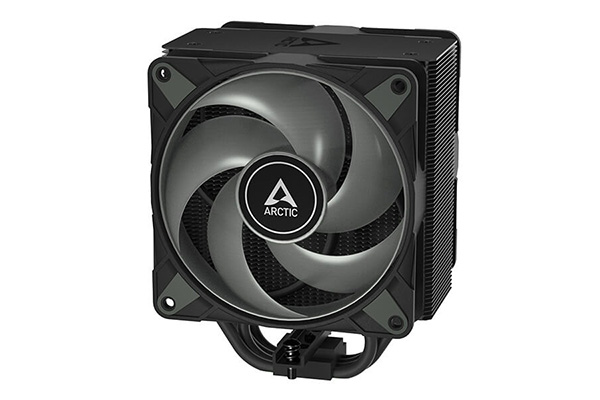
13. Can You Upgrade Your CPU Cooler While Removing the Current One?
Upgrading your CPU cooler is a great way to improve your system’s cooling efficiency. Đây chính là điều thú vị… If your current cooler isn’t cutting it, upgrading to a better model can make a huge difference in performance.
When you remove the old cooler, you have the perfect opportunity to install a new, more efficient model. Câu chuyện thực sự là gì? A high-performance cooler will keep your CPU temperature down during intense tasks, allowing your computer to run faster and more reliably.
When upgrading, make sure the new cooler is compatible with your CPU socket and motherboard. But wait, there’s more… Check the cooler’s fan size to ensure it fits in your case.
Table 13: Factors to Consider When Upgrading Your CPU Cooler
| Nhân tố | What to Consider |
|---|---|
| Cooler compatibility | Ensure the cooler fits your CPU socket |
| Cooling capacity | Choose a cooler that can handle your CPU’s thermal load |
| Case space | Make sure the cooler fits inside your PC case |
14. How Do You Prevent Issues When Removing the CPU Cooler in the Future?
Proper preparation can prevent most issues when removing the CPU cooler. Nhưng đây mới là điều đáng chú ý… Establishing a routine for maintenance can help keep your cooler removal process smooth and efficient.
Always use the right tools and take your time when removing the cooler. Bạn đã sẵn sàng cho phần thú vị chưa? You can also mark screws or parts to make reassembly easier, and always use quality thermal paste.
By following these steps, you reduce the risk of damage, ensuring that future cooler removals will be hassle-free. Câu chuyện thực sự là gì? A well-maintained cooler will run efficiently, and your system will stay cool.
Table 14: Tips for Future Cooler Removals
| Mẹo | Hoạt động |
|---|---|
| Use the right tools | Prevents damage to components |
| Take your time | Ensures that parts are removed gently |
| Mark screws and parts | Helps with easier reassembly later |
15. What Are the Common Mistakes to Avoid When Removing a CPU Cooler?
When removing the CPU cooler, it’s essential to avoid common mistakes that could lead to damage. Câu chuyện thực sự là gì? One of the most common mistakes is applying too much force when removing the cooler.
Another mistake is not properly cleaning the CPU and cooler after removal, which can lead to poor thermal performance. But wait, there’s more… Always ensure that thermal paste is applied evenly, and the cooler is seated correctly to avoid future overheating problems.
By taking your time and following best practices, you can avoid these mistakes and keep your CPU cooler functioning efficiently.
Table 15: Common Mistakes to Avoid
| Sai lầm | Consequences | Giải pháp |
|---|---|---|
| Applying too much force | Damaging the CPU or cooler | Use gentle pressure and the right tools |
| Not cleaning components | Reduced thermal efficiency | Clean the cooler and CPU regularly |
| Improper thermal paste application | Overheating and poor performance | Apply thermal paste evenly and in the right amount |
Phần Câu hỏi thường gặp
Câu hỏi 1: Bộ tản nhiệt CPU là gì?
A CPU cooler is a device used to dissipate heat generated by the CPU, keeping it at an optimal temperature for performance.
Câu hỏi 2: How does thermal paste work?
Thermal paste helps to improve the heat transfer between the CPU and the cooler, ensuring efficient cooling.
Câu hỏi 3: How often should I clean my CPU cooler?
You should clean your CPU cooler at least once every 6 months to prevent dust build-up and ensure proper cooling.
Câu hỏi 4: Can I use any cooler to replace the original one?
Yes, you can replace your CPU cooler with an upgraded model, but ensure it’s compatible with your CPU and motherboard.
Câu hỏi 5: What should I do if I damage the CPU while removing the cooler?
If the CPU is damaged, you may need to replace it, but first, assess the damage and consult a professional for repair advice.
